Sunday, July 31, 2011

Ai Dye

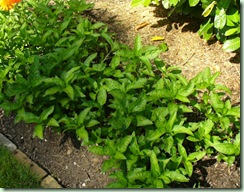
My Japanese indigo, known as “ai” in Japan, has been doing quite well in the dye garden despite the rather disappointing summer weather.

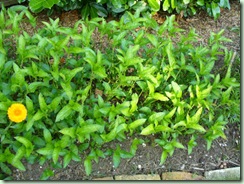
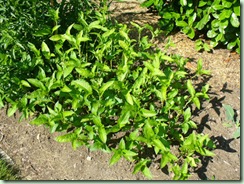
AiPlants_beforeAiPlants2_before 

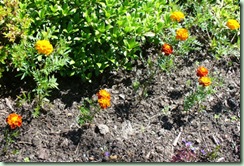
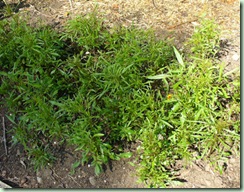
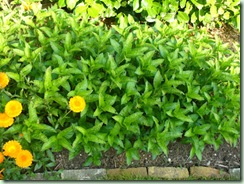
(The flowers are calendula sneaking in.) Persicaria tinctoria (aka Polygonum tinctorium) is in the buckwheat family and although it likes sunshine and some heat also needs constant moisture to grow well. Both patches, the one planted before The Hail Storm (left) and the one planted after (right) were knee-high and I thought it was time to try harvesting some to dye with. Looking up all the information that I could find, both online and in my personal library, gave me such conflicting advice on how to go about it! I figured I had lots though so could afford to play it by ear. I already have had several years’ experience with woad to draw upon and hoped that would help. Ai has more indigo precursor in it so it should be even easier, right?

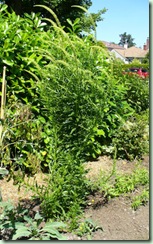
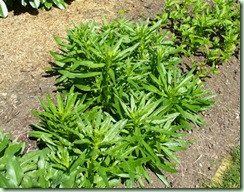
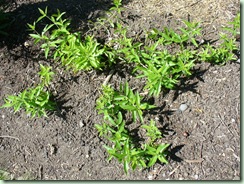
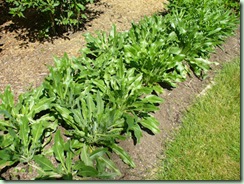
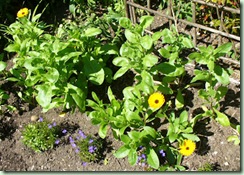
My friend Kirsten came over to play too and we picked just over 500g of leaves. Sources varied on what and how much to pick so I compromised by choosing the lower leaves and some of the upper ones leaving a topknot of the newest ones to continue growing. They look a bit silly now:

AiPlants_after AiPlants2_after

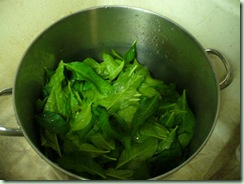
I think they’ll get over it. Eventually. I found a couple of leaves that had been accidentally hit by the weedeater that showed dark blue on the edges. A good sign! We washed the leaves and covered them with cold water in the dye pot:

AiLeaves

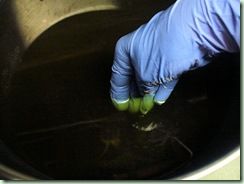
This is a departure from woad where I would have added them to boiling water. Instead I brought the ai leaves slowly up to barely a simmer (around 70C) until they changed colour and looked “cooked”. This process took around 45 minutes or so. Next, instead of quickly cooling to 50C before removing the leaves and adding the soda ash (3 tsp), we carried right on with the hot solution. Kirsten generously gave me her old stick blender for the dye studio and we used that to aerate the dark brown liquid. The bubbles turned blue almost immediately but we kept it up for awhile and then switched to dumping the solution from one pot to another just to make sure we got it oxygenated enough. Then we added the thiourea dioxide (2 tsp), wrapped the pot in towels to keep the heat in (it was still quite warm, over 55C) and went to have some lunch on the deck.

When we came back the vat looked and smelled quite good. The temperature was still warm and there was a thin indigo “flower” on the surface:

AiIndigoFlower

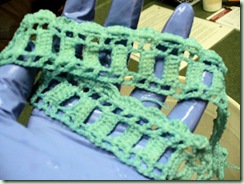
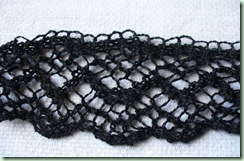
So we started popping things in! I was determined to dye my Amiga sweater but held off until Kirsten put in some crocheted cotton lace as a test:

TestDips

It took quite awhile to oxidise to blue – much slower than I’m used to with woad. It stayed turquoise and didn’t develop true blue for at least 10 minutes. Interesting! I did three dips on my sweater, airing as long as possible in between:

Amiga_airing

Here it’s still wet. We also dyed and overdyed several skeins of yarn: silk, cotton and rayon. The pot was pretty depleted by this point:

AiVatEnd

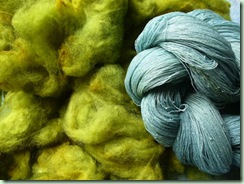
But I tore off some of the weld-dyed wool fleece (from the last dye session) and threw that in at the end for two last dips. I wanted to see how the weld overdyed:

Ai Dye

Lime green! The rayon skein that was dyed after my sweater never did lose it’s hint of turquoise. It reminds me more of woad than regular indigo. I let the sweater oxydise for 48 hours before rinsing:

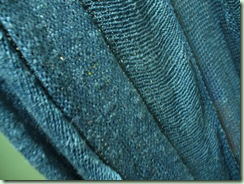
Amiga_dyed

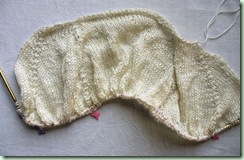
It didn’t turn out very dark but it’s quite even and I love this sweater! For all of its airiness it’s rather cosy and comfy. For some reason the sleeves blocked out bell-shaped though they were knitted straight. I might be inspired to make something else from this rayon slub yarn now that I’ve seen how nice it comes out in the knitting!

We dyed approximately 400g of fibre in total. We never did get a dark blue from this ai vat but I suspect that’s because the weather hasn’t been consistently sunny this summer and the nights are definitely cool. However it seems like quite a promising dye plant, being easy to start and grow and no harder than woad to extract. I should have at least one more chance to play with it this year. Now if I can only get some seeds to develop before frost I’ll be very pleased indeed.
Wednesday, July 27, 2011

Miscellaneous Dyeings

Wanna see the results of Monday’s dye session?

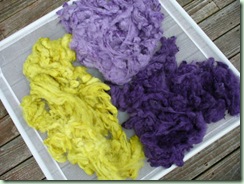
Weld and Logwood

Pretty huh? Who says that natural dyes are dull? That’s logwood purples and weld yellow on Merino-X fleece. I grew the weld myself too but of course not the logwood which was leftover-leftovers from Spectrum’s last dye day. Now I need to tease and card and spin that up and then decide what the heck I’m going to do with it! Stranded knitting springs to mind. I also have the peach-coloured part of this fleece, dyed with madder exhaust, to add to the colour palette. Do I have enough for a sweater perhaps?

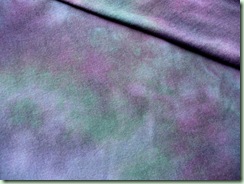
I also promised to show the fabrics from Sunday’s Procion MX dye session. First there’s the formerly boring lavender-purple cotton jersey:

CottonJersey

I use the general guidelines in Ann Johnston’s Color By Accident. I scrunched the damp 2 metres worth up in my stainless steel commercial chafing tray and poured plum and green (proprietary mixes from Maiwa) over, then soda ash solution, then a fairly strong black, and lastly more soda ash solution. Then I let it sit for a couple of hours while I worked on the second batch of fabric.

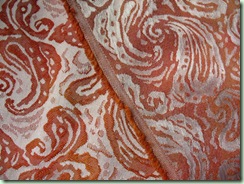
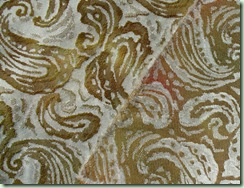
This one was a white home-dec jacquard weave with an unknown fibre content. I tested a snippet in the first bath and part of it dyed so I carried on and got the most amazing results:

Paisley rust  Paisley moss

I divided the 2 metres of fabric into two and stuffed the first piece in a large bucket. Then poured on mixtures of rust, scarlet and gold yellow dyes. After 10 minutes I added the soda ash solution and scrunched the second piece on top and poured on moss dye (another Maiwa colour – one of my favourites) and then more soda ash. Dyeing them stacked meant that some of the dye from each got on the other to make them very compatible. The bottom one always has the most mixing. I love that effect.

The other wonderful effect is the way the rayon? cotton? part of the fabric took the dye deeply and the polyester? part only stained slightly and looks silver in contrast. The paisleys just pop out and the fabrics are distinctly different on each side! Sooo cool. Now if I can just get the pattern to fit me properly, I’ll have a nifty new skirt.

I’ve already cut out the tunic from the scrunch-dyed jersey and it’s looking great so far, merely pinned to Debbie Double. I’ll probably finish it later today. I decided to forego the “deconstructed” thing and sew proper hems. Just can’t bring myself to leave them unfinished. After all, this isn’t a one-season item! I want it to last for at least 10 years. Kind of like these garments in yesterday’s outfit:

Tuesday outfit

(Pay no attention to the stupid expression. I was watching the timer on my camera!) This blouse is from a pattern from the late 1990’s and the (faded) skirt is somewhere near the same era but with a recently-added wide yoga pants-type waistband when the elastic died. So I was trying to relearn how to wear a belt. Can’t say it’s particularly comfortable. Now I remember why I never wear one! Since I don’t have an obvious waist in front it tends to shift around and not stay put. If it’s too tight it rides up under my bust. Can’t win. Oh, and I was wearing Birkenstock sandals instead of my usual boots! Of course I changed to my red Blunnies later when we went for groceries. Heh.
Amiga_back Amiga_done

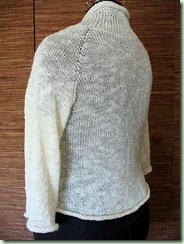
While we’re at it – and before I dye it tomorrow – here’s the finished Amiga sweater. I didn’t put in buttonholes so it’s just pinned on Debbie. It’s also not yet blocked because there’s no point when it’s going to be dipped in indigo anyhow. The rayon slub yarn makes it very drapey and slinky. I think it will be a good trans-season sweater. More anon when it gets it’s blue dip.

Speaking of which, my buddy Kirsten is coming over tomorrow to play with my Japanese indigo (Persicaria tinctoria) with me. This will be my first efforts trying to get blue from this plant and I’ve been reading up. Every source I’ve consulted has different instructions for extracting the leaves so I’m somewhat confused! Perhaps I’ll just do what I do to woad and see what I get. It should theoretically be very similar even though the plants are different species, wouldn’t you think? The chemistry involved is much the same, yes? Wish me luck. If I screw up the plants will grow more leaves and I’ll get another chance in a few weeks. And there’s always the woad as well.

Tuesday, July 26, 2011

Fell Off

Sorry about that! I got busy and instead of blogging I was dyeing-gardening-washingfleece-watering-walking-etc. You get the idea. So where did I leave off? Checking back to the last post…oh, yeah. Last Thursday. Sleeve Island. No longer there. The Amiga sweater is done – except for the dyeing. I plan to play with my first Japanese indigo this Thursday and dip the boring white rayon. It’ll be an adventure! Wish me luck.

What else? Black Rock’s rows are finally feeling shorter. Happily I can finally knit on it and read simultaneously so it’s going faster. Cruising to the finish line now and I’m excited to see what it looks like blocked.

I tried to cut out my Butterick 5362 View B tunic from some old faded black cotton jersey and found out why it was still in the stash after so long. That stuff is Garbage! Literally. It skewed badly and just wouldn’t fold flat so I couldn’t even cut out the two simple pattern pieces. Phooey. Also it was more blotchy-faded (aka blech, not funky) than I thought. Not even good for a knit muslin. Gone. Next option was a nice slightly heavier cotton single-knit in a boring lavender purple. I liked the fabric but not the colour so it needed to be dyed first. Tell you about that later. Meanwhile no sewing got done.

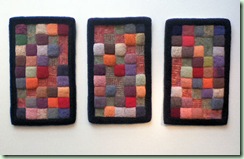
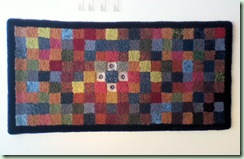
So where are we up to now? On Friday T-Man and I went for our walk, this time down to Granville Island to see my friend Michelle Sirois-Silver’s hooked rug exhibit at Crafthouse:

MichelleSilver_rug3 MichelleSilver_rug2

The show is called SHIFT and these are my favourites from it. The “shift” mentioned in the title is the move that rug hooking is taking from utilitarian/floor to wall/art. These pieces in particular combine other techniques with the hooked loops. The left triptych has needle-felted wool fibres with stitching in between the very fine sculpted hooking. The right piece has stitched grommets added to the centre. I just love the mashup of traditional random squares with contemporary fibre-art stitching. Michelle taught the one-and-only rug hooking class I’ve ever taken. She’s a total sweetie.

Next we went to Maiwa to see the current collection of Bangladesh quilts from Living Blue. They are spectacular and even T coveted one of the bed-sized pieces. This is another mashup: Japanese-style nui (stitched) shibori, old sari fabrics and kantha (running) stitches. So beautiful. Sorry I didn’t get a chance to take photos. There was a female musician parked right in front of the window display (playing and singing rather annoyingly too) so I couldn’t get a good shot.

Around the corner in Maiwa Supply I bought some Procion MX dyes. I only needed black really but ended up with plum, crimson, and green as well! Unfortunately I forgot to get some more of the Unicorn Power Scour because I’m getting low – especially after washing more fleece yesterday. But I’m getting ahead of myself. On the way home we stopped to watch this guy balancing rocks:

GI_balancerocks2 GI_balancerocks5

No glue! He did smooth the points somewhat though as he hunted for the balance sweet spot. Fun. There was a selection of little rocks provided so you could try it too. Not easy but one kid had a stack of 3 going.

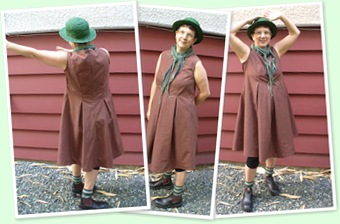
Here is the outfit that I wore for our walk:

(I’m testing this Windows Live Album thingy so let me know if it doesn’t work for you.) This is my Vogue 8509 dress that I recently finished sewing. It looks a bit wrinkled but I’d been hoofing around for about 3 hours by that point! The hat is plaited green-dyed raffia that I made 6 or 7 years ago, the scarf is one of those cheap cotton ones from India, the leggings are my “chub-rub protectors”, the socks are handknit by me and the boots are my brown Blundstone chunk soles. This outfit is so very me!

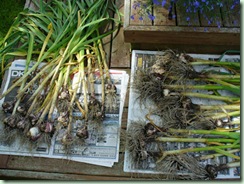
Wow! We’re only up to Saturday so far. The weather was nice but not too hot so that day was for gardening. We have garlic! Softnecks on the left and hardnecks on the right:

Garlic

I’d have left them in a little longer but they were starting to get rust. Sunday was much hotter and a good day to dye. So I got out my new (and old) procions and dyed not only the purple cotton knit but also some home-dec paisley jacquard. The photos are still in the camera so more on that later. Hint: they all turned out quite surprisingly.

I think we’re up to Monday/yesterday now. That was a busy day! More dyeing, only this time with natural dyes. I washed the last 500g of Merino-X fleece leftover from last year’s class with Anne Field. I again used the Power Scour and it worked great in the washing machine (no agitation of course) using straight hot water with a couple of kettles of boiling water thrown in. I used the machine’s spin to get all the dirty water out of two washes (one with half the amount of detergent) and one rinse. Done! Compared to Orvus, Power Scour rinses really easily.

Next I packed the clean wool into 3 mesh bags and mordanted it in 10% alum. The day before I had tried one more extraction of the now slightly mouldy logwood left from our last Spectrum dye day so I put one bag of wool in that bath. The second bag went in the now very depleted original logwood bath. (That’s the one that didn’t go mouldy because we used it on Masami’s silk shirt last week. The heat killed the mould.) And while the third bag of wool waited for a pot to become available, I extracted the dye from an approximately equal weight of my half-dried chopped weld. Have I mentioned that I’ve been cutting up my big weld plant? Took me days and I have a blister to prove it. Anyhoo, the last bag finally got into the weld along with some calcium carbonate. Both weld and logwood like hard water and mine is soft-soft-soft. I use either a couple of Tums or calcium supplements which seems to help. After an hour or so of simmering I left the wool in the dye baths to cool overnight.

Today I need to rinse out all that dyed wool and see what I’ve got. I’m hoping the colours will go nicely with my peach-coloured (madder exhaust) wool from the same fleece. Natural dyes are like that though – it seems that no clashes ever occur. They just meld like old friends. Unfortunately it’s raining this morning so drying the wool quickly is going to be problematic. At least I was smart enough to bring in my drying garlic and the pile of chopped weld last night and close the greenhouse roof. I knew it was going to rain. Hopefully it will clear up later on.

Thursday, July 21, 2011

Stuck On Sleeve Island

I’m trying really hard not to be cranky-frustrated. What’s the point in fighting with inanimate objects? Just go with the flow. ommmm….

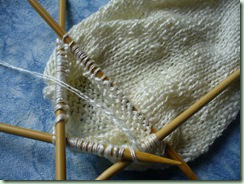
OK, that feels better now. I’ve been desperately trying to get the sleeves finished on my Amiga sweater and they just seem to argue with me every step of the way. You might ask why they are so difficult, since they are simple tubes, no shaping, 3/4 length. AKA piece o’cake. Not. The slippery doubled rayon yarn, large needle size relative to said yarn and knitting the sleeves picked up onto the body of the sweater means Trouble. I’ve tried every different combination of needles: bamboo dpns, long magic loop, short two circulars – and  all of them feel too fiddly and leave unsightly ladders in the knitting. I managed to finish one sleeve and I’m halfway done the second but I’ve just switched back to dpns again:

Amiga_sleeve

Trying 4 this time instead of 5 which were just too heavy for the fabric. And too many points sticking everywhere. pfthhh! Can’t wait to pick up the front band/collar and just knit straight on with my favourite Addi lace circular for awhile. And hope the sloppy tension evens out with dyeing and blocking. Must. Stick. With. Sleeve.

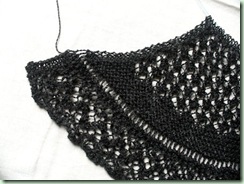
I’ve also finished the Rock Island chart on my Black Rock Shawl and now am on the ever-diminishing garter section in the centre:

BlackRock_prog

Doesn’t look like much all unblocked like that, does it? I was hoping it would be easy to knit this part without looking at it but, our sainted Elizabeth Zimmermann to the contrary, I’m not so comfortable with garter as I am with stockinette. And I need reminding which rows to do the decreases on. After getting confused (mostly because I wasn’t paying attention) I had to put a marker in the beginning of the right side. Plugging away when I get bored with Amiga’s darn sleeves.

I’m also feeling grumpy because this morning it was raining yet again. It stopped now but the garden is out of bounds until it dries up somewhat. I never got out there again yesterday while the getting was good because T-Man wanted cherries. So instead we walked all the way down to the farmer’s market to hunt for the first organic cherries of the season. We only buy produce from the market that we can’t grow ourselves so we ignore all the greens, garlic scapes, summer squashes, blueberries and raspberries and head instead for the stone fruits and root vegetables. I cannot grow a good radish or a carrot to save my life! They get tough and stunted and bug-infested and are just a waste of garden space so I no longer even try them. Along with radishes and carrots (many colours! red, yellow and white as well as orange) I bought beets (more colours!) and kohlrabi which I have also tried to grow with no luck. Sorry I didn’t take a photo. Bad blogger. Kohlrabi is another of those underappreciated veggies. Yummy raw with dip or grated in coleslaw. I never cook it.

Speaking of beets, I ate my first beet greens last night stir-fried with mushrooms, garlic scapes and orange sweet pepper and liberally doused with soy sauce. Yum. Who knew they were good as well as good for you? We also had a salad of grated pink and white beet with orange carrots. I’ve hated beets all my life and only now am I discovering that they can be quite delicious in the right recipe! Maybe it was the slimy canned version boiled to a fair-thee-well which was the only kind on offer when I was a child that turned me off for so long? I hated (English) peas for the same reason. Unless they were fresh and uncooked. I was always first to volunteer to shuck them!

It seems to be clearing up outside now but I want to go sew my tunic that I mentioned yesterday instead. I finally finished fooling with the pattern. All the fussing has inspired me to finally finish making a bodice template (or several: regular, for knits, shoulder-princess, armhole-princess) so that I don’t have to do this every single time with every single pattern. It’s getting tedious. I matched up the finished armhole with the one from my last dress and they are nearly identical anyway! So there ya go.

Lessons learned:

  • Stick with it even when it’s tedious.
  • Use what you’ve already learned.
  • Get out while the getting is good.
  • Eat your veggies; but don’t overcook them first.

Wednesday, July 20, 2011

Adventures

Yesterday was an interesting day. In the morning I hosted the meeting of my weavers’ guild’s Equipment Rental people. (We’re all old friends so it wasn’t as onerous as it sounds.) We have quite a few small looms and spinning tools available for members to rent and also for use in hands-on demonstrations. These are all stored at different homes and recently rentals have fallen off quite a lot. So we spent some time trying to figure out what we really need and what we could sell. Unfortunately quite a few of the items are old and not in the greatest shape due to mishandling over the years. Much was donated to us thinking we could use it. However I think we’ve managed to hash out a plan. Personally, I wouldn’t mind having a little more space in my attic storage. I’ve had the spinning stuff for so long I can’t remember when I got them! 15 years? No clue. I do know I’m the only person who has used the McMorran Yarn Balance in all this time. So I’m buying it for myself! Heh.

After the meeting, a couple of ladies were heading over to Jefferson’s (wholesale notions supply) so I enthusiastically tagged along. This place is heaven, especially to those of us without a business licence! Isle after isle of supplies: thread, needles, gadgets, buttons, scissors, interfacing and just about anything else you can imagine for sewing or quilting – except fabric. I thought I was being good and not going nuts but it still cost me about $70. They also record the regular retail prices on your bill – mine came to $125 so I saved quite a lot. They carry some complete lines such as Clover and Dritz plus lots of other manufacturers too, so I can find things that my local retail shops don’t always carry. The best news is we discovered that I can shop there whenever I want using my friend Cathie’s account! Danger, Will Robinson! I can walk there from my house. Happy sigh.

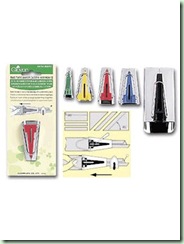
Because it was a spur-of-the-moment visit, I didn’t have a shopping list prepared. Trusting to my memory and wandering up and down the isles is not a very efficient way to shop in Notions Heaven! However I did find the Clover bias tape makers that I wanted:

CloverBiasTool

I got the 3/4” and also a 1/2” (to see if it works better than my Prym one). Now that I know where to find them I can always pick up the others as I need them. Apart from the usual sewing machine needles (including a 2.5mm double which I’ve been hunting for awhile) and assorted little items such as hooks and eyes, I also got this nifty tool:

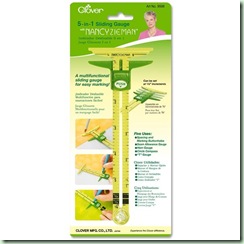
Clover5in1tool

This is the Clover 5-in-1 Sewing Gauge and it’s a huge improvement over my old metal one which I use all the time. The slider locks in at 1/8” intervals instead of slipping out of place randomly. The guides are larger and much easier to see. You can even use it for a circle compass! Pricey beast, but very worth it.

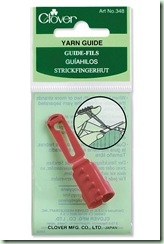
I also found a Clover yarn guide:

CloverYarnGuide

I’m hoping this will help me knit stranded patterns easier. Without constant practice I’m losing the ability to knit English-style so my old “main yarn in the right, contrast yarn in the left” technique is failing badly as my tension goes to heck. I can’t seem to get the trick of using both strands on my left but perhaps this will fix the problem. Or not. It’ll be a cheap experiment.

Gee, it looks like Clover is my favourite manufacturer, doesn’t it? Coincidence? Or just good products? I’ll let you know how it goes with these ones. And I’m making a list for next time.

But that wasn’t the end of my busy day. After T-Man and I both got home nearly simultaneously, we decided to go see the last Harry Potter movie. We walked up to Oakridge Mall where we were happy to see our niece who works at the theatre. She let us in free! And the movie was all that I’d hoped, the perfect ending and very well done. Kudos to a superb 10-year ride – on a broomstick! I didn’t even mind that it was in 3D except that the plastic glasses were uncomfortable on my nose over my regular glasses after an hour or so. I’m not a fan of 3D really and, if it’s well-done, find that I don’t notice it much after a few minutes. If it’s not well-done, I get annoyed with it even faster. Those icky cardboard red/blue glasses? Blech. Give me a clear high-def 2D and I’m happy. However, this was pretty good and I think I’m still picking bits of Voldemort out of my hair! Heh.

Back to work in the studio. I’m working on adjusting the pattern for this tunic, View B:

B5362

This pattern, which seems as if it should be really simple, has big problems. Firstly, it’s drafted for a woven fabric and I want to use a knit so it’s hugely over-sized. I started with a size small, believe it or not! Then the darts are completely in the wrong place for me plus I needed a full-bust adjustment so I started with that. Trying the tissue on Debbie Double, I discovered that the front at the armholes is really wide but the back shoulders are too narrow plus the armhole is a little deep for a sleeveless style and the neckline is a bit low for me. Jeepers! It would have been easier to draft this thing from scratch! So needless to say, I’m going to make the first version (aka wearable muslin) into kind of a deconstructed thing with unfinished hems and the neck and armhole finishes just turned to the outside and stitched. The fabric I’m using is a lightweight cotton single jersey that has been lurking in the stash long enough for the original black to fade to an odd brownish colour. Did I say deconstructed? I might even do some discharge patterning on the hem. Or not.

And I never did get out to the garden to rescue my dye plants and seeds. Yesterday when I was busy it was lovely out. (At least we had a nice walk!) Now it’s back to gloom. Is there a summer for us here? Quickly please before it’s winter again?

Monday, July 18, 2011

Quick Update

Sorry, this is another picture-less post. I’ve been wanting a photo of my new dress for you but it’s dark and dreary and not too conducive to taking pictures. However, the plumbing is fixed! Whoo-hoo! T-Man and his new plumber’s snake did the trick. Then we cleaned up and put the kitchen sink area back to rights. I washed a huge bunch of dishes that had collected over the days of No Drains. All is well and it works better than ever now. Amazing how we get used to something functioning a certain way and don’t really notice as it gets slowly worse. But we sure notice when it doesn’t work At All any more. Kudos to T and his many fine talents! It took him a lot of work and spoiled his weekend but it sure saved us a huge plumbing bill. Our house might be nearly 80 years old but it’s ours and we try to take care of it.

Speaking of which, today is general cleanup day around Damselfly’s Pond. The weather is still iffy – as in it sprinkles on us every time we step out the door, but is fine if we stay in. We’re expecting some sun this afternoon. I’ll believe it when I see it. I need to vacuum and clean the bathroom since I have a meeting of my weavers’ guild’s Equipment Rental people (of which I am the Spinning Department) tomorrow morning. We are to decide what stays and what goes and where it goes to. I think. Perhaps I should bake cookies.

I also need to get out to the garden to pick a few things (snow peas! lettuce! baby squashes?) and tidy up the dye garden. The big second-year weld plant sadly collapsed in the rains and is just about ready for harvesting anyway. I want to keep a little of the flowering tops to ripen for more seeds so I’ll have to re-stake it. Also in the seed department, I need to collect the woad and Chinese woad seeds and get the rest of the second-year bolted plants composted before I get accused of letting them get loose on the world. The horror. Heh. Despite the cool rainy weather most of the plants are growing quite well, particularly the Japanese indigo and the calendulas. Now we just need some sun and heat to bring out the colour. At least I haven’t had to water much recently.

Sunday, July 17, 2011

Is There A Plumber In The House?

Just a quick note to say that we have Big Trouble in the pipe department around here. On Friday the kitchen sink stopped up. It had been getting worse over the last month and no amount of boiling water poured down seemed to help. I warned T-Man that last time that happened (while he was away on business) it had completely blocked up the minute I used the plunger. This time was no different! Unfortunately this time my cure (lye from the dye chemical stash) did absolutely no good.

No slouch in the fix-it department (though annoyed and reluctant), T took things apart, snaked and poured and scooped and dumped – all to no avail. So he went and got a better snake and a replacement piece for a pipe that broke in the kafuffle. Finally the sink drained but…it filled up the sink below in the basement instead! The clog is still there but it just moved down the line. More draining and snaking but it’s still blocked. Sigh.

So coffee, tea and breakfast have been a bit of a challenge this morning. We can’t run the water or pour anything in any of our three sinks. That leaves only the toilet and the bathtub. At least we can pee and shower! But I have dishes piling up and I don’t relish doing them in the bathtub. T has to work tomorrow which only leaves today for him to finally fix it. I can’t really help much except to do clean up (black goo, yum!) or I’ll just be in the way. However so far he is still in bed, in his dressing gown, reading a book. Do you think he’s avoiding the problem?

Me too.

Thursday, July 14, 2011

On A Wet Thursday

It’s raining today because of course T-Man watered the garden yesterday. The little sprinkles we had yesterday and the day before didn’t do much especially under the very large hazel out front. So I think we’re all watered nicely so it can stop raining now! Please. Sadly we’re supposed to be stuck with cool, cloudy, sprinkly weather for the foreseeable future. Bleh. I truly think those folks sweating back east should send us some of that sunshine so we can have some summer too. Just a thought. I’ll trade you some cool shade for it!

Well, I sewed all yesterday afternoon but I’m not finished the pleated dress yet. I struggled with the invisible zipper for quite awhile. It’s been a very long time (as in decades) since I’ve sewn an invisible zip and now I know why. Some people think it’s easier than a centre application but to me, at least, it’s a PITA! The zippers themselves seem flimsy and delicate and I hope this one lasts as long as the dress does. I basted it in several times in a vain attempt to match the checks. Didn’t help. Also I used my new invisible zipper foot for the first time:

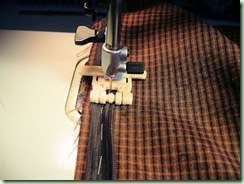
InvisibleZipFoot

It’s ugly, weird and plastic but it does work. The shape keeps the coils rolled out and the donut in the centre pushes down the stitching line. You use the left groove for the first zipper side and then switch to the right for the second side. I wish I could use my walking foot with it though because my old Pfaff doesn’t always make even stitches without it. Only certain presser feet have the cutout in the back to allow the walking foot to click in. Instead I had to help the fabric through with my hands but gently so as not to break the needle or anything. The finished seam with the zipper looks ok now that it’s done. On the outside. I didn’t take a photo but the inside looks like a dog’s breakfast! Especially where I tried to serge the edges after the fact. If I was a sewing teacher I’d give it maybe a C-. Good thing nobody but me will see it, huh?

So far the dress looks good on Debbie Double but I think it needs a little tweaking on the princess seams over the bust and a little taking in on the side seams near the waist. I’m restricted in how much I can adjust by the fact that the pockets are already sewn in but it shouldn’t need more than a little nip. This is supposed to be a loosely-fitting dress anyhow. But not voluminous. I did stitch the princess seams/tucks down 2” further which makes it lie nicer over my tummy and behind. Otherwise it was heading into maternity territory.

My adjustments for the neckline and armholes are looking pretty good and don’t need anything further. Now I need to remember to transfer any tweaks to the pattern for next time. If there is one. It’s always helpful to know what works in case I need the information in the future – even for a different garment. It’s all a learning experience so I take notes as if I was in school! With an disappointing C- mark for my efforts too.

Switching gears to knitting news, have you seen my old buddy Sivia Harding’s newest pattern release? Her new Harmonia’s Rings Sweater is based on the Harmonia’s Rings Cowl with the same clever beaded twist at the neck. I love it and could definitely see it in a handspun yarn. Yet another addition to my never-ending queue! I’ve recently decided that if I can spend money on a magazine that doesn’t offer anything much that I’d like to knit, then I can spend the same amount on a single pattern that I really want to make. Plus the money goes directly to the designer who deserves it.

Speaking of magazines with not much of interest, I recently downloaded Interweave’s EntreKnits e-mag. After I was so thrilled about the Colorways e-mag, this one struck me as kind of meh. It seems like it’s padded and gussied up to look like more than it is. With only 5 patterns, none of which grabbed me – except maybe the 3D bracelet – it’s really depending on articles and videos for content. As usual, I haven’t even gotten around to watching the videos yet but the most interesting article to me is “Who Invented Modular Knitting” by Jenna Wilson. It’s kind of a detective story! Otherwise there’s a lot of cute digital tricks that are really just fancy advertising. Yawn. I’m going to stop jumping for these digital magazines and try to become more discriminating in my purchases.

That goes for print too. I’ve been disappointed in a few magazines lately. Is it just me? Now do I have the discipline to leave them in the store? Or will my compulsion to have the Whole Set win out? Usually if I quit a title, I quit for good. If I keep buying it, it’s because I’m expecting it to improve again. Wishful thinking? Oh horrors. Maybe I’ve finally reached some kind of saturation point? Is that even possible?

Wednesday, July 13, 2011

More Sewing Stuff

There’s a few questions in the comments on yesterday’s post about the “rub-off” technique for making a pattern from a finished garment. Heather, from what I’ve read there is a method of putting muslin over the garment and literally rubbing a pencil down the seams to trace it. That’s probably where the name comes from in the professional sewing industry. I think the pin method is more accurate, though in my experience it still needs some truing up after you’ve removed the garment.

Evelyn, of course you can take apart a garment if it’s worn out. It’s more time-consuming but probably a lot more accurate. However, the garments in the book were still good and/or vintage pieces that the author wouldn’t want to destroy while making a pattern out of them. There’s also a tutorial on an intriguing method using the plastic wrap Press’n Seal for copying a garment. This stuff is so handy for so many things I wonder that anyone uses it for food! My roll lives in the studio. If you aren’t familiar with it here’s a description lifted from Wikipedia:

“Glad Press'n Seal has its surface covered by shaped dimples, which hold the adhesive away from the surface. While being handled, the wrap is unsticky, but when pressure is applied the dimples are flattened and the adhesive pushed against the contacting surface, sticking them together. The adhesive used is a special edible type similar to chewing gum.”

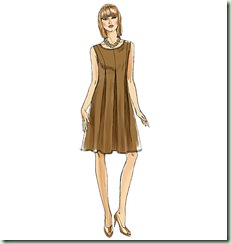
Well, I didn’t make use of my newfound rub-off skillz yesterday. Instead I cut out the sleeveless version of Vogue 8509:

V8509

I already did all my myriad alterations on the pattern a couple of months ago so it was ready (hopefully!) to chop into my fabric. It’s a tiny woven check in what I think is a poly-blend of some sort. I purchased this stuff ages ago so I can’t remember any details. (Good reminder that I should keep better notes about my fabrics, huh?) It’s actually rust, tan and black but it “reads” as brown so I’m using brown thread to sew it with. Currently all the main seams are pinned but not sewn yet. I also needed some bias tape for the neckline and armhole binding so I got out my new 1/2” bias tape maker:

BiasTool

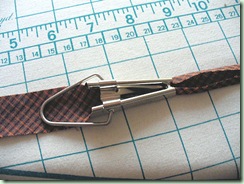
It worked pretty well though there is a bit of a learning curve with this tool, especially when going over any seams in the bias strip. The iron goes on the right there with its side next to where the folded fabric is exiting the tool. The right end is pinned to the ironing board so I have something to pull against as it feeds through. I also have a 1” as well as the 1/2” one which I think are made by Prym/Dritz. I found out there’s a better version of the tool by Clover so now I’m keeping a lookout for the 3/4” version which for me is the most useful size. There’s also a tool that can apply a strip of fusible tape as it creates the bias which I expect might be useful for quilters or other surface design applications. Of course then you have to buy the fusible tape rolls too. Have I mentioned how much I detest purchased premade bias binding? So much nicer to have perfectly matching binding.

Speaking of matching, I tried to match the check as I cut out the pieces but I don’t know how accurate I was or whether it really matters with such a tiny repeat. We’ll see how well I’ve managed! Also I have a brown and a black invisible zip of the right length and I’m having difficulty deciding which one to use. The black matches the black stripes but it seems like too much contrast on the fabric. I think the brown, which is still darker than I’d prefer, is less jarring even though pretty much all that shows is the pull-tab.

I’m looking forward to seeing how this dress works out. My fitting skills are improving exponentially but the proof is in the sewing up, right? BurdaStyle had a recent discussion of whether or not to make a toile (muslin) first and my answer is that I do as much fitting as possible in tissue. It’s much cheaper and sometimes I need to refigure, chop and tape, and retrace a couple of times before I get it right. I usually pin the tissue together and fit it on Debbie Double before I do a fresh neat copy incorporating as many of the changes as possible. Most of my fashion fabrics are pretty cheap anyhow – not a whole lot more than muslin – so I usually dive in and make the final garment from the tissue pattern. Unless I’ve made some miscalculations it usually works fine. Perhaps if I were sewing some very expensive fabrics (handwovens, anyone?) or a really complex pattern then I might break down and make a toile first. Usually I still try to make it a wearable garment. I’ve had so-called “wearable muslins” last longer and get worn more than the final special one!

I should get back up there to the studio and get sewing, shouldn’t I? I’m hoping to avoid watering my garden today if it actually rains as much as it’s supposed to. So far it’s rather dry out there.

Tuesday, July 12, 2011

Today’s Review: Copying Clothes

Man! I’m exhausted. After having the larger Grandbeasties yesterday for the second time in 3 days, I’m taking it a little easy today. Now I remember why I had small children when I was in my 20’s! I had a lot more stamina then. Or maybe I just had no choice but to hang in there even when I was tired? I didn’t have handy grandparents who would take over anytime I wanted, T-Man was working 50+ hours per week and we didn’t have enough money to hire a babysitter very often. Am I trying to compensate for that and be there for my grandkids the way I’d wished for myself? Don’t get me wrong – I adore the beasties and absolutely enjoy having them. I’m just not up for it every day even with Grampa T-Man’s help. Luckily it usually works out to having them over Just Often Enough. We miss them if we don’t see them at least every couple of weeks.

So of course I haven’t accomplished much of anything else, particularly in the crafty department. I got a partial row knitted on my Black Rock Shawl and got interrupted by a child’s request and there ya go! That was it. I got a little more done on my newest knitting project, mainly because it’s mindless stockinette:

Amiga_beg

This is my version of the Amiga cardi from Knitty in a doubled slub rayon weaving yarn. It’s much farther on now than this photo from the other day. I’m down a number of inches past the armholes and cruising for the hem – which is just a bind-off row because it’s just plain knit all the way. I plan to make it a little longer than the waist length the pattern shows. Then on to the 3/4 sleeves and a large collar/front piece that is just a long rectangle. Easy-peasy. This is my mindless knitting for the moment since the shawl is halfway through the lace chart and needs more attention. Also I need to dye this sweater in something from the garden, likely either woad or Japanese indigo, and it needs to be completed first before I can do that. The black wool/silk shawl can wait although I haven’t actually stopped working on it entirely. It’s definitely not too warm for wool today!

I think I did promise something more interesting to talk about however. Let’s have a book review, shall we?

Patternmaking Book

Patternmaking for a Perfect Fit: Using the Rub-Off Technique to Re-Create and Redesign Your Favorite Fashions by Steffani Lincecum (2010, published by Watson-Guptill).

I got this book recently because I have a number of garments in my stash that I would love to re-create. I’ve done this before, pinning and tracing and then truing up the shapes and adding hems and seam allowances. It works pretty well if you can get the piece flat enough. The author describes 2 methods : the paper method and the fabric method. The later is used for more 3-D items that can’t be flattened, in this case a purse, where you drape around the piece. The flat paper method is used for a pencil skirt, a 1960’s sheath dress and a vintage blouse. Then there are descriptions of how to alter the basic pattern “rub-off” to change the fit and/or style options. Interspersed are helpful hints and tips plus some basic sewing instructions to assemble the garments.

What I liked:
This book starts out quite well with a lot of helpful information. This technique is a great way to duplicate a favourite closet item and either make a similar garment, tweaking the fit if necessary, or morphing it into a number of different styles. Anything that gets you away from using the popular pattern companies’ rather boring offerings is all to the better, IMO! The styles shown are cute and quite wearable if you want to copy the ideas – providing you can find a similar garment to start with. Some of the sewing hints are very detailed, such as how to hand-finish a lapped zipper for a couture touch. I particularly liked Steffani’s explanation of the way she handles adding the darts to your tracing which is kind of an important part of the puzzle.

What I didn’t like so much:
As most often happens, for me at least, I feel that some information is overly detailed, some is skimmed too lightly and some is missing altogether. Perhaps the author could have used the available space for more detail on the pattern tracing and alterations and less on the sewing? One could always refer to a good sewing book for those details but the how-to’s for duplication of a garment isn’t something that’s discussed very often. Only featuring three garments and one purse to copy seems like a very small sampling though there are quite a few “refashioned” garments shown for each one. I’d rather see more different garments rubbed off and less restyling, some of which stray rather far from the original which is used more like a basic block than a pattern which is a whole ’nuther subject, aka pattern drafting. Altering for fit is barely skimmed, probably because she expects you to start with a garment that fits pretty well and there are a couple of good fitting books available for that if you need it. I’m also not really happy with the illustrations of pattern pieces and layouts which seem rather vague to me. A lot of space is wasted, for example with not one, but two large drawings of how to link two buttons to make cuff-links just a few pages apart. I’d rather see how the skirt sections of some of the dresses are made instead. The focus is on the bodices only. More detail photos in general would have been very helpful even for the more experienced sewer like me. This book isn’t really for the absolute newbie.

Besides my rather minor complaints, which may have been beyond the author’s control anyway, I have no regrets buying this book. I especially enjoyed the stories about the author’s adventures in making clothing for TV and movies. Plus the tale of finding her great-grandmother’s old newspaper patterns gave me goosebumps. It illustrates that there is nothing new in wanting to make a garment like one you already own, only better! These days it’s not so much about thrift as it is about creativity. I’m inspired to get off the computer now and up to the studio.

BTW there is a more complex garment rub-off tutorial (originally from Threads #92) here. Turns out the authors Blossom Jenab and Kate Rittenhouse are local folks too! Small world.

Monday, July 11, 2011

Playtime With Logwood

My Spectrum dye study group came over on Thursday and this time we played with logwood. I hadn’t had time to mordant anything so luckily I discovered a couple of skeins of silk weaving yarns that had been pre-mordanted – probably years ago now. One was a bombyx silk skein that was a little stained and fragile so I have no idea if it will hold up to use. Perhaps as a weft but there’s not enough for even a scarf length. The other skein was a larger one of tussah silk. We used 200g of logwood sawdust and that was probably way too much, even for 5 or 6 people’s skeins! I divided the extraction pot after we sieved out the sawdust into 2 pots. One had more logwood in it or we didn’t stir it up much before pouring because the dyed yarns came out of it darker and more navy than purple. The other pot was a little lighter and with more of a purple tint. Here’s my two skeins, one from each pot:

Logwood on silk

They’re actually even darker than they look in the photo! Logwood usually isn’t too giving of exhaust baths but the second batch came out a lighter violet and quite pretty. Sorry I didn’t take any photos at the time! Now I still have 2 pots of nearly exhausted dye sitting down on my dye stove waiting for me to either put something else in or dump them out. I’m leaning toward the dump idea. I also still have the logwood chips which may or may not give more colour. Perhaps I should try another extraction, add that to the combined exhaust pots plus some alum (since I don’t have anything else that’s already mordanted) and see what I get? It’ll probably have to wait until tomorrow though before I have some time to hunt down some more yarn and play with the leftovers.

I’m actually not a huge fan of logwood. It’s pretty in a muted sort of way but it does tend to fade to brownish tones if you aren’t careful to keep it out of the sun and to wash it in neutral detergent. Apparently a little iron mordant helps but it tends to mute the colours even further and it’s so easy to use too much and get greys/blacks instead of purples/blues. Unless of course that’s what you want! I believe logwood-dyes yarns are best used for accessories and garments that are worn and washed only rarely rather than wall pieces or household textiles that would see a lot of light and use.

The rinse-out of loose dye can be really tedious with logwood. It has been suggested that leaving the dyed yarns to oxidise for a couple of hours to a couple of days before rinsing can help set the dyes in the fibre. I plan to try this next time! I did a little googling around and found an interesting technical document on industrial dyeing of black colours with logwood extracts. It’s a bit difficult to understand some of it (at least for me!) and you couldn’t use the same chemicals or processes in a home environment (for instance chrome is the main mordant) but it does mention that logwood will dye nylon and acetate as well as wool - and other animal fibres including ostrich feathers, pig bristles and horse hair, silk, cotton and jute. If you’re curious, see what tidbits you can glean from this file. Here’s one that I found, though I wasn’t able to locate exact percentages to use:

“For the dyeing with iron, copper and oxalic acid. Bring the bath
containing the wool, the Logwood and the oxalic acid to boiling temperature and maintain it at 95/98°C during ten to fifteen minutes. Then let the temperature drop naturally to 60/70°C in twenty minutes just by stopping the steam and keeping the bath moving. One can then add fixing salts (copper sulphate and ferrous sulphate, beforehand dissolved in soft water) and bring the bath back to boiling temperature which one will maintain during forty-five minutes to one hour: enough for the complete development of the black on wool and the progressive exhaustion of metallic salts. This can be observed by the successive colours of the bath: from gold
yellow to brown ale, then back to pale gold yellow at approx. pH of 3,5. After the dyeing operation, the dyed wool should lay down or drain during at least two hours, so as to help the oxidation and to obtain, with the rinse, little coloured water.”

Quite a teaser, huh?

I’ve decided that rather than my recent propensity to write super-long posts with big gaps between them, I’m going to break things up a little more and post more often. We’ll see how long that promise lasts, shall we? Meanwhile I need to go clean up my kitchen. For some reason I have been avoiding the dishes for a couple of days. Yuck!

Tuesday, July 05, 2011

Bountiful

It’s somewhat later than usual but we are finally enjoying our Annual Strawberry Pigout:

BreakfastStrawberries

These are some of the ones I had for breakfast this morning. Delish! We don’t grow them anymore ourselves but the local strawberries are such a treat – nothing at all like the huge flavourless strawberry-shaped rocks from California (no offense to those hardworking growers). You can smell the ambrosial scent from their baskets as you walk by the market! Smaller but deep red all the way through and they only last a few days in the fridge so you have to use them up quickly. Absolute Essence of Strawberry-ness. We don’t eat jam and I never remember to use them frozen so we usually just wolf down as much as possible while they are in season. Quickly followed by the Annual Cherry Pigout and later the Okanagan Peach & Apricot Pigout…happy sigh. We also plan to make a lot more of those cherry “raisins” in the dehydrator this year. They were so yummy on cereal in midwinter.

This is the way folks ate in the Olden Days before refrigerator trucks and bulk imports from warmer climes. You just ate up what you couldn’t preserve when it was ripe. Even if that meant having the same thing at every meal for weeks! Then you had to wait until next year to enjoy it fresh again. Though I love the modern ability to have fresh produce available in January (such as local greenhouse peppers and mandarin oranges, which of course don’t grow here), there are some things that are just worth waiting all year for. We’ve been anticipating fruit season for months now! In our garden the raspberries are ripening now but the blueberries are way behind and the blackberries are still just flowers.

Just thought I would also show you how the dye garden is growing. Here are the 2 kinds of calendulas (aka pot marigolds):

Calendula1Calendula2 

The first variety has larger variable single and double flowers and the second ones lighter and have pretty dark centres. I’ve already been drying some of the petals but there’s not nearly enough yet even to dye a small skein. Lots of buds however! I’ve never used these before so it’ll be interesting to see what colours I can get. Perhaps I should try the two varieties separately? Though they’re going to have to give me a lot more flowers first.

Another more traditional yellow is the weld:

Weld 2ndYear Weld 1stYear

The big second-year plant is taller than I am! And nearly ready to harvest, I think. The ones I planted this spring are all bolting so perhaps I should start some new ones though I’m not having good germination with the purchased seeds and sadly none at all from those I saved from last year. I may not have left them to ripen long enough. I still haven’t tried dyeing with my weld yet but I only had one small batch from last year that is all dried and bagged. The plants smell distinctively pleasant both fresh and dried, like grassy fields. I’ll soon find out what the dyebath smells like!

Next for golds and greens are the marigolds:

Marigolds

They’re rather spindly still due to being held too long in pots and also from the cold spring weather and the depredations of hungry slugs. I have patches of these all over the garden and already have a handful of spent flowers in the freezer. I try to keep them well dead-headed. Wonder if the slug slime adds to the colours I get? Probably not, huh?

Here’s the coreopsis for oranges, rusts and yellows:

Coreopsis

You can just see one tiny flower so far. They are very small still and probably were the worst damaged by the violent spring hail storm so are taking a long time to recuperate. I have a second planting too but it’s even smaller. I’m still anticipating lots of flowers eventually.

For reds and oranges I have good old madder:

Madder

The patch is pretty small because I only had 5 good crowns when I turned out my old galvanised buckets that used to hold my madder. This is their first year after surviving winter so it’ll be a few more seasons before I can harvest the roots. I’m trying to expand the amount by encouraging the fallen-over stems to root. They definitely look better so far than they did in the pots last year.

We have the yellows, oranges and reds and now to the blues. First woad:

Woad

It’s doing quite well except that at least 4 of the plants have tried to bolt on me, just like the weld. (I chopped their heads off!) And we won’t even discuss the disappointing Chinese woad that completely bolted when it was still little. I have 4 new plants but they are very small. The regular woad will be ready for a first harvest if as soon as it gets some good hot sunshine. Today is perfect. More please!

Then there’s my first experience with Japanese indigo:

JapaneseIndigo

It’s looking pretty healthy and nearly up to my knees but I don’t think it’s ready to harvest anything quite yet. Like the woad it also needs some hot sun. I have a second younger patch as well, planted when I wasn’t sure about the hail damage. It’s nearly as tall as the first planting now. I have to keep these guys watered because they don’t like to dry out at all.

Obviously I have the makings here of a whole rainbow of colours, don’t I? Plus there are other things like the walnuts and blackberry shoots as well. Anybody know if yellow-orange alstromoeria (Peruvian lilies) produce any colour? I have massive heaps of them (actually an annoying weed that pops up everywhere!) and they are just starting to flower. There is no information anywhere that I can find so I’m guessing they aren’t a good dyestuff. Of course I could always give it a shot anyhow. What’s to lose but a few weeds? Very pretty weeds they are too – at least for the few weeks while they’re in flower.

Monday, July 04, 2011

Drats

Here I thought I had the edging of my Black Rock Shawl finally done. But before picking up the edge stitches for the main part of the shawl, I carefully looked over every repeat and found a mistake:

BlackRock_error

Can you see it in the middle of the photo there? A slight W instead of a V where I accidentally repeated 2 rows of the pattern. Luckily it’s only a mere 14 repeats back from the end! Could have been worse. It only negated the last couple of intense knitting sessions. Pooh. And here I thought I was checking carefully as I went along, though this error is pretty subtle to spot. Nevermind. I’ve already frogged and tinked back and am now carrying on. Again. It’s all about the process, right? Besides, it’s going to be spectacular when it’s done.

I do have one FO today. I finished these on the camping trip but didn’t get a chance to wash and block them until a few days ago.

Clown Urp Too Socks

ClownUrpTooSocks

For:  Rosebud

Begun:  June 17, 2011
Completed:  July 2, 2011

Yarn:  Schachenmayr nomotta Regia Stretch Color, 70% superwash wool/23% nylon/7% Elité (stretch polyester), colour 81 (multi), dyelot 51724, 199m = 50g. Used just under half a ball. Finished the toes with yellow superwash fingering yarn from the leftover bin.

Needles:  Blackthorn carbon fibre dpns, US0/2mm.

Pattern:  Damselfly’s basic baby socks on 44 sts, 3.5” before heel flap, 3.75” before toe decreases, dec to 20 sts (5 per needle), dog ear reduction to 16sts.

Comments:  This pair uses up the leftovers from the first pair. I managed to neatly run out of yarn right at the toe decreases so I dug in the leftover bin and found some bright yellow to finish up the toes. They’ll show nicely in her special boots!

I also finally have a progress photo of the Amiga sweater that I’ve started using some well-aged rayon slub yarn from the weaving stash.

Amiga_beg

I’m using the yarn doubled and it has become my relaxation knitting because it doesn’t take much attention. No, it won’t stay white! As soon as it’s done I’ll dye it with either woad or Japanese indigo, whichever is ready in the garden for use at the time. This is a great pattern by Mags Kandis from the Spring/Summer 2011 issue of Knitty and there are so many attractive finished sweaters on its Ravelry page. I think this will be a handy lightweight cardi for me.

In other news, our anniversary dinner was wonderful last evening! After munching on bread dipped in lobster oil, I had the ahi tuna and T-Man had the halibut chef’s special. We shared a bottle of white wine and a crème brûlée for dessert. Total Heavenly Yum! Now I had best get out into the garden to water it before it gets too warm out there. It’s finally feeling a little more like summer but it’s still chilly at night. T even threw my little woven wool afghan over the still-sleeping me when he left for work this morning. So sweet.

Sunday, July 03, 2011

Annual Fambly Campout

I’m back! Well, actually we’ve been back since Wednesday but we’ve been so busy in the garden since then that I haven’t had any real blogging time. Somehow with T-Man around I manage to keep busier than normal! Sheesh. I’m going to have to watch for this tendency when he retires. (Soon!) We’ll have to develop a New Normal. Heh.

MtFrosty

Well Manning Park was fun though cold and damp for at least the first few days. Saturday night it even froze as you might imagine by the amount of snow still on Mount Frosty there. We all froze too even though I had an extra quilt on top of my heavyweight sleeping bag. The Rosebunting kept Rosebud fairly warm but she sure didn’t like not being able to munch on her hands. She was so layered up that she couldn’t even bend her arms! There were campfires going even during the day which is unusual for us. Stargazer wouldn’t keep his coat on but at least his Granny-knit sweater kept him warm:

Stargazer

I’m amazed it still fits him he’s been growing so fast. The trail through Strawberry Flats was even more snowy than usual too but we managed to get to our traditional stopping place where we had our traditional snowball fight.

SnowballFight

This is where the path got too covered in snow for easy walking. It felt good that I was fit enough to be able to truck Rosebud this far in her Snugli:

Me and Rosebud

She likes it when she’s facing front to see everything. She even kept her hat on! I wisely swapped with her dad for the return trek though.

Rosebud and SuperPrincess

By Sunday night however Ms Rosebud had had it with camping and kept waking up every hour crying. So they all packed up and Super-Princess fed her a last bottle before the trip home. Then the remaining grandbeasties went fishing:

Stargazer with Fish

Stargazer was so happy to catch his Whopper! (There was a little help from Grampa with casting out.) He’s been going on and on about it since last year when his sister got the big one. No slouch, she of course got one too:

Vamp with Fish

(Love the model pose!) He made sure to measure his against hers and declared that they both win. Too cute. Then they also went home Monday afternoon and left us to the peace and quiet for a couple of days. At least it warmed up somewhat.

LakeEnd

On Tuesday we decided to hike around the whole of Lightning Lake. This is the south end where we, um… got stuck. Perhaps it was those spawning trout that you can just see in the photo? Or perhaps the late snow melt clogging the upper slopes. Anyway, just over the little bridge and up the trail a short way we ran into a mama black bear and her yearling cub. Too close for comfort! So we had to turn around and go back to the Rainbow Bridge and by that time decided that a nice relaxing rest back at camp might be a better idea. Notice there are no photos of the bears. We were too busy retreating with alacrity!

FairySlipper

We did stop long enough to see lots of new growth in the forest: some pretty flowers such as avalanche lilies, paintbrush, arnica, and the not-so-pretty newly emerging devil’s club. This one is a fairy slipper orchid (Calypso bulbosa). So tiny and delicate.

Getting back on Wednesday turned out to be a tricky endeavour. We unfortunately left Manning about the same time as the huge mud slide happened on Highway 1 near Bridal Falls. They hadn’t got the warning signs and barriers up yet so we ended up having to turn around and go back 26 kilometres to Hope to get over to Highway 7, the narrow winding alternative route. Of course everyone else was going that way too! In total it took us 4-1/2 hours to get home – half again as long as it usually takes.

It was lovely that so many family members managed to make it this year. Besides our kids and grandbeasties, there were T’s brother and his family (including extra friends), a nephew and his 2 kids (though one got sick and had to be returned home), and our daughter-in-law’s dad. A total of 19! Nana was very glad she opted out because she would have been much too cold the first 2 days until it finally warmed up.

Rainbow

How do you like the new Rainbow Bridge that T-Man discovered?

Changing the subject abruptly, today is T-Man and my 40th wedding anniversary! We are celebrating by ourselves and have reservations at the Pink Peppercorn for dinner tonight. Yum. Yes, we were babies when we got married! Those who know us are not surprised that we’ve made it this far I’m sure. We’re a little bit grayer, a little bit fluffier around the middle and (I hope) a little bit wiser but otherwise we’re pretty much the same as we were then.

Right now though we need some groceries. The sun is out and life is good.