Saturday, June 30, 2012

Garden Update

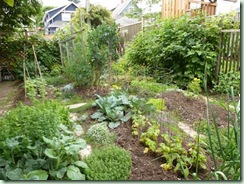
Another whole week got away from me and now it’s the last day of June! Sheesh. So what has this damselfly been up to? The weather has been variable but slightly warmer than it has been. We managed to get out in the garden for a couple of good sessions. How about a whirlwind tour? Here’s a shot of the “back 40”:

Back40

Things are growing. Finally. Those poor cucumbers in the right foreground are just recuperating and starting to flower. I lost 2 of them when their roots got eaten? rotted? Something unhappy. If nothing else stops them by the end of the season they will be up to the top of their cages and embellished with string suspenders. The squashes are starting to do something too. See the baby pale green zucchinis?

BabyZucchini

This is a new variety for me this year. And the garlics have scapes:

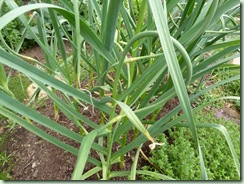
GarlicScapes

I love how they curl around. Yummy too! Like an extra present from the garlic. The tomatoes in the greenhouse are starting to become taller than me now. Not too many flowers yet however. And don’t forget about Buddy’s tomato:

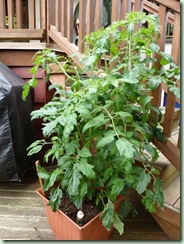
BuddyTomato

You can tell how much the plant has grown by how small he looks next to it! Lots of flowers but no fruit yet. I picked the first broccoli and snap peas:

SnapPea

They are quite late and I doubt I’m going to get too many this year. I had to replant when many didn’t come up. Or got eaten by the birds since I forgot to net them over. In the dye garden the madder is doing the best it ever has:

Madder

It’s really too bad it’s not a more attractive plant, huh? Stickery. Sprawling. But the only real red dye in my garden. I actually could use about three times as much as I currently have. The second-year weld is taller than I am and starting to bloom:

WeldFlowers

I had to stake them because they were falling over from the rain. I didn’t plant any new baby weld this year because I already have enough dyestuff and the 3 or 4 that volunteered this year equals Way Too Much Weld! It’s a lovely colourfast bright yellow dye and so easy to grow. It reseeds itself too but is easy to weed out extras. Should be in every dyer’s garden.

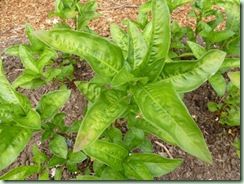
What else? Oh yeah, the poor woad which had to be replanted twice is finally catching up:

Woad

They’re not too exciting yet and it doesn’t help when Somebody’s Stupid Dog is allowed to tromp all over my garden. Grrr… At least I have the Japanese indigo as well:

JapaneseIndigo

Like the squashes, it’s not liking the cold and rain much but since the weather has been a little warmer it’s finally starting to grow again. The usual marigolds, coreopsis and calendulas are doing well. The whole garden looks quite nice if I do say so myself. I did have some help. Heh.

In crafty news, I’m still not quite done the second 10-Stitch Blanket. One more side to go. Sewing-wise I drafted a top pattern and then found out the only suitable fabric wasn’t sufficient. So I went to Plan B and struggled with another top pattern draft. Remember the Anthropology top from 2010? No? I’ll have to locate the original images. Anyway, I finally figured it out (I hope) and am currently cutting out the pieces from 4 different fabrics. Plus I’ve discovered that there’s enough fabric left from these scraps to make several more garments. One thing leads to another, doesn’t it? Too bad I’m so slow at sewing. Actually, it’s more like slow at tweaking the pattern. The sewing is usually pretty straightforward after that.

Off to get something useful done.
Saturday, June 23, 2012

Me-Made

Every day I read crafty blogs with pleasure and interest. Sewing, knitting, dyeing, stitching, home-dec – whatever DIY projects people come up with. I love to watch people become aware that they can indeed Make Stuff and I love it even more when it’s not just pretty stuff but actually really useful too. I want to see everyone blending the me-mades into their real life to the point where it just becomes absolutely normal. Yes you can. We did.

We’re swiftly coming up to T-Man’s and my 41st wedding anniversary early next month. No, I’m not soliciting congratulations. (Though it seems like that’s a big deal to some it’s just another day! We try to celebrated them all. Heh.) But as I sit here on my bed with my little netbook plugged in beside me, I suddenly realised how much I’m surrounded by things that we have either made or made over in those 4+ decades. The rag quilt (sewn) and woollen blanket (dyed and woven) on the bed, the bed itself (woodwork), the headboard (rug hooked), the 3 small rugs on the floor (one latch hooked, 2 handspun and woven), the trunk (family antique, painted and upholstered), the vintage bureau (new handles and painted), the desk (another family antique, stripped and refinished). And that list doesn’t include the smaller things like the handwoven runner on the antique dresser, the bowls (woodturned) that hold jewelry (mostly me-made) and coins, and let us not forget a lot of the clothing in the closet (woven, knitted, sewn, crocheted). There’s also more handmade stuff in the bedroom not made by us but by other people. And this is one single room in our house. I could give you a similar list for every other room.

But I won’t bore you to death! I realise that T and I were kids in the 1950’s when everyone was trying to put the WWII deprivations behind them and pretending to be the Father Knows Best and Leave It To Beaver families. We were teenagers in the Beatle-mad and Mad Men ‘60’s and young parents who where just trying to get established in the ‘70’s with little money and less credit. What a lot of younger people might not know is that there was quite a strong movement towards “back to the land” and DIY that is kind of mirrored today in the “green” and “sustainable” movements. The difference today is the Internet which allows information to be transferred among all the like-minded so much easier than in the past. You want to learn how to do something and there’s 217 blogs, 25 videos and a Craftsy course available! It’s truly amazing. Don’t take it all for granted, ‘kay? I still remember how hard it was to learn to use my first spinning wheel with nobody around to teach me.

Now do NOT get me started on how busy everyone complains they are these days! You have the same 24/7 as folks have had since folks began. And nowadays there’s also washing machines, dryers, dishwashers, microwaves, vacuums, lawnmowers, cars, child care and schools. You don’t have to cook over an open flame nor grow, harvest, dye, spin and weave all of the textiles in your house. Unless, of course, you want to! It’s all about priorities. People have an uncanny ability to find the time to do what they want to do badly enough. Think about it.

Yeah, I know. This post is swiftly getting out of hand. (Hah! Pun.) And no pictures to distract you either. Didactic Damselfly. Actually what got me thinking hard was following a link to this article. It’s an excerpt from Overdressed: The Shockingly High Cost of Cheap Fashion, a book by Elizabeth L. Cline. I’m sure there’s much more food for thought in there but I’d be afraid I wouldn’t want to buy anything ever again which isn’t realistic. However, now that we’re on A Fixed Income, I’m quite pleased with the way my wardrobe is becoming even more Me than it already was and all without buying anything except sewing supplies. And I’m even swearing off that as long as I can stand it and just working from the stash…er, stashes. Perhaps I’ll make an exception for thread or zippers or the like – but only if there’s absolutely nothing suitable available in-house. Let’s see how long I can go! Me-Make with Me-Stash.

Changing the subject entirely, I was really happy that we did NOT go camping this weekend. Although yesterday morning was pretty nice, it went downhill into sogginess as predicted. I never did get out into the garden. We went to a movie instead.

Sidebar: “Prometheus” in 3D is really excellent! I almost forgot I was wearing the stupid glasses on top of my own because I was too busy rooting for Noomi’s character. Do I detect the hint of a sequel some day? I want to find out what happens next.

Stoopid weather. It rained hard all night but this morning of course, just to tease us, it’s sunny out again. OK. Done. Now lets all go make something.

Friday, June 22, 2012

The Big Reveal

I know everyone has been dying to find out how the Great Bathroom Fix of 2012 went! So without further ado:

BathroomDone

Ta-Dah! Yeah, I know it doesn’t actually seem like it took more than 2 weeks of hard work. But trust me – we’re both exhausted! Sorry about the awkward shot. The room is so small that there’s nowhere to take most of it in except from the doorway. The wall colour shows best at the left there by the mirror. It’s called “Red Stone” but it’s more like chocolate syrup. We were a little disappointed in the fact that it’s very shiny even though the base is semi-gloss. The trim (window, door, inside cupboards and drawers) is called “Moonlight White” and it’s a yellow-based near-white. It’s a properly semi-gloss finish. Go figure. Both are Behr paints.

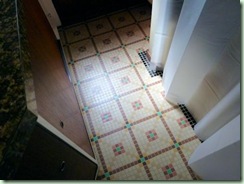
Anyway we’re quite pleased with the revamp even though it really doesn’t look a whole lot different. Except cleaner and brighter. We know how much work we put into it in places you can’t see like the pipes, caulking and sink replacements. And the places you can see like the painting, oiling the wood and scrubbing and waxing the floor. See how shiny it is?

BathroomFloor

I love the way the tiles resemble a quilt. T says he isn’t quite done yet however. He wants to put some quarter-round edging under the counter and in a few other spots just to “finish it off”. And add a plastic shelf on the window sill for my jewel orchids which are currently banished to the living room. Personally I’m waiting for the paint smells to abate. I’m quite done with this project.

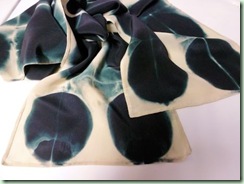
In other news, I finished another discharged silk crepe scarf:

BlackScarftheSecond

This one is long and narrow instead of square. I used 2 CD’s clamped onto the folded fabric. But not without first melting 2 of T’Man’s plastic clamps in the simmering thiox solution! Grumble. Whereupon I switched to my metal ones which I obviously should have used in the first place. Then the CD’s started to break down too. Obviously I’m not very good at this discharge thing! There’s a reason the Japanese itajime tradition used wood and string, no? You can see where one CD split there on the left circular shape. I left this scarf in the solution a lot longer this time and although I kept adding more thiox a little at a time, the process went very slowly. Or maybe I was more patient in spite of the “mechanical breakdown” issues. Regardless, I’m quite happy with the outcome. Even if I now need to replace T’s favourite clamps.

I also finally managed to finish this project:

Pleat-Neck Blouse

BlouseFront

Completed:  June 2012

Fabric:  a vintage 100% cotton sheet, light pinkish-mauve.BS09-2011-128_line Dyed after sewing.

Notions:  Gutermann cotton sewing thread, natural. Mettler poly sewing thread, light brown. 5 buttons, light brown.

Pattern:  BurdaStyle 09-2011, #128

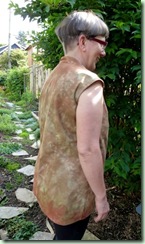
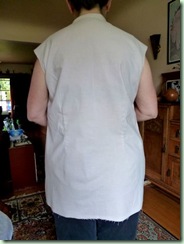
Comments:  I think this blouse turned out all right! It started out as a muslin because I was quite unsure of the shoulders and armholes and whether I could get this pattern to fit me. As usual I traced a smaller size for that area and went wider for the bottom of the blouse. I also brought the underarm higher by a whole inch because the model seemed to have gaping issues there. In fitting the blouse on my body I added back darts to shape the boxy back a little. I’m boxy enough without bringing attention to the fact. A bit of shaping is much more flattering:

BlouseBack

Notice in the photos there’s still a bit of an issue with folds appearing at the armholes. I couldn’t figure out on the odd pattern shapes how to slope them enough for my ski-slope shoulders! I think it’s not too much of a drawback however. Because of the raised underarm seam there isn’t much gaping going on.

Even though this was supposed to be a muslin, early on I decided to make it wearable by sewing with cotton thread so it would take dye later. (I left off the buttons and buttonholes until after the dyebath.) There was no way I was ever going to wear a pinkish blouse so over-dyeing was the only option. Luckily I’ve had lots of experience with that! Here’s the nearly finished blouse scrunched into the dyepot:

BlouseDye1

Cool reflections in the very shiny stainless steel! Then I sprinkled on enough warm water to get it all wet. Maybe a cup or so total. I mixed up 3 dyestocks: 1/2 tsp moss (a Maiwa mix) in 1/2 c. hot water, 1/4 tsp chino (a ProChem mix) in 1/4 c. hot water and 1/4 c. scarlet (Maiwa base colour) in 1/4 c. hot water. That equalled 1 tsp total dye in 1 cup water. Pouring them over was fun:

BlouseDye2

After 15 minutes I added the soda ash (1-3/4 tsp in 1 cup hot water) over top. I didn’t mix much but just pressed and poked a bit with a gloved hand. Then I covered the pot and went away for the rest of the day. Later on I rinsed first in cool water a couple of times and then into the washing machine on hot with a dash of Synthrapol. When it was finished it went in the dryer. It came out damp and wrinkly so I ironed it right away. The finished colours are always a lot lighter than they seem in the dyepot:

BlouseDye_det

My own personal “camo”. When worn with my green Sweat Skirt, the outfit matches my new Romika shoes perfectly!

In case you thought I’ve forgotten all about knitting, I’m on the last round of T’s Ten-Stitch Blanket. I also started a new project: a dress for Rosebud. She won’t be wearing it until next autumn so I hope it will still fit the growing girl by then.

More on this anon. I’m off to get out in the garden while it’s not raining. We were going to go camping in Manning Park this weekend with T’s brother and sis-in-law but the forecast for the mountains is frankly depressing. Rain, rain, and more rain. So we decided to sit this one out. (Either that or I’m just to lazy to pack up the van!) However, so far it’s not bad out there at all. Mother Nature is such a tease.

Monday, June 18, 2012

The Great Bathroom Fix Pt.3

Yes, I’m still here though I’m Super-Tired. This project is certainly taking longer than I originally thought it would! It’s also taking more money and a lot more energy. Just the painting alone took us 3 days, one for each coat. I only took one picture because my hands were mostly busy but I just loved this view:

BathroomPainting

Isn’t it hilarious? Told you it’s a really small bathroom, didn’t I?  If you’re wondering where we hid it, the toilet is squeezed in the niche in the back between the window and the bathtub. It also was completely covered in paper! I love T-Man’s diligence with the masking but it was hard to find the handle to flush. That pink is the undercoat not the final colour. I’m saving that for the Big Reveal.

Today the paper is gone and we are on the home stretch. And I don’t have to help! Yay. After spending a goodly part of yesterday on my hands and knees scrubbing the floor tiles and scraping grout, I’m grateful for a reprieve. A bit more caulking, a final bathtub bleach and rinse, and waxing the floor and (maybe!) it’s done. The poor 80-year-old porcelain tub has no finish left on the bottom so it’s particularly hard to clean. But as T says: at least it’s not slippery!

To hide spiff up the old tubby we got a new shower curtain and liner plus new metal hooks. (We finally turfed the ugly brown plastic ones that we’ve had for about 35 years. Yay! Didn’t owe us anything.) The liner is the pale yellow-gold of the tub and the outer curtain is translucent white with a white tree silhouette. I’ve never had more than just a liner before so this should be interesting. We also got some new clear glass mugs for the toothbrushes but can’t find a soap dish that we like. Still hunting that item along with a toilet brush that isn’t cheap and tacky. Found a stainless steel version but it was $30 – and no way to replace the brush easily if it wore out. No thanks. This little venture has already cost over $300 and taken more than 2 weeks so far. No wonder I’m exhausted. And a bit sore in a few muscles but not as bad as one might expect. All that gardening must’ve toughened me up.

Nothing much else to report. We went to our neighbourhood car-free day yesterday and enjoyed watching all the people smiling and having fun. I get such a kick out of walking down the middle of what is usually a really busy Main Street with several thousand of my neighbours! I also bought some more of the cheap lightweight Indian scarves that I seem to succumb to every year from the same street booth. I can have one for every outfit at 3 for $10 so naturally I bought 6 this time. My knitted scarves are too warm for summer (assuming we ever get any). And the rayon and cotton ones get sweaty and smelly so need frequent washing. I’m set now until some of them wear out. Or until I weave some better ones myself. I know scarves are really popular right now but I’ve been wearing them year-round for a very long time. The fashionistas are currently all copying my signature look. Heh.

Tuesday, June 12, 2012

The Great Bathroom Fix Pt.2

Where were we? Oh yeah. The hunt for a sink. We found one!

BathroomSink

(Don’t you love our vintage ‘60’s arborite?) The new sink colour is “bone” and although it doesn’t match the rest of the fixtures exactly, at least it’s not white. Best of all it cost less than $100. The hard part was putting it in because the hole in the counter was too big and the sink slipped right into it. What to do? We brainstormed for awhile and finally realised that we needed to use the aluminum ring from the old sink. So T-Man cleaned it up and sealed it in place with both caulking and its own clips underneath. The new one went on top with its seal and bolt-clips and it worked! The taps and drain hook-ups went really easily in comparison. This beast should last the duration of our time in this house. Neither of us want to do this ever again.

Next was the bathtub pipes:

BathroomPipes

Notice that lovely turquoise blue pipe? Yep. Completely corroded. Now imagine them all shiny copper. It only took T-Man the better part of a day (once he quit procrastinating) but it went really well and now the pipes are replaced. Yay! And we avoided hiring a plumber. Pfffttthhh!

Now we need to start painting. We tried avoiding it for a couple of days but today is The Day. First it needs an undercoat because we’re switching from alkyd to latex enamel. I definitely like painting with latex better but it sure doesn’t last nearly as well as the old nasty stuff did. We have a bureau and a trunk in our bedroom that were painted about 40 years ago and they barely have a chip out of them. (No, don’t laugh. Yes, we keep things that long. Longer actually.)

But first we have to get our rumps out of bed!

Meanwhile, I finished my Ten-Stitch Blanket and am concentrating on T’s which has less than 2 rounds to go. That’s actually a lot more knitting than it sounds but I’m working on it. I’ve been working on these blankets since February! I’m amazed at how much leftover sock yarn there was and the bin still isn’t empty.

I also finished narrow-hemming the long narrow black silk crepe scarf and washed it to get the residual dye out. The first wash in Synthrapol was deep sea green! It took 2 more rinses to come clear. No point in discharging loose dye, right? It just uses up the thiox too quickly which I’m sure is what happened to my square scarf. Didn’t think to rinse it first. Duh. I also washed out the rest of the silk from which I will make a luxurious version of my pettipants. There’s just enough left. I made sure before I cut the scarf length.

Not much else to tell. We spent a delightful day last Sunday with little Rosebud who is now walking everywhere. We took her to the new playground a few blocks away but it was too crowded and not much for a toddler to do without getting run over. So we went back to our old Grimmet Park where the little ones hang out. The play apparatus is great for kids up to about 7 but doesn’t attract the older ones so it’s not so crazy. The pea gravel underfoot was difficult for her to walk on but great fun with the sand toys I brought along. Rosebud needs some shovel practise but she already knows how to stir the stone soup! And share it with Granny and Grampa. Yum.

One more thing. I read this great essay on creating. I totally agree. Enjoy.

Wednesday, June 06, 2012

The Great Bathroom Fix

Yep, we’ve started on the bathroom. The tiny One-And-Only bathroom in our old house. I have no “before” pictures because frankly, it was disgusting! Mould, spider webs, dust, dirt, peeling paint, rusted-out sink and, last but not least, bathtub piping that has needed replacing for about 30 years. That’s what you get for living in the same house for decades – an almost imperceptible build-up of grunge that you just learn to not see. You know it’s there though. You just don’t want to deal with it right now.

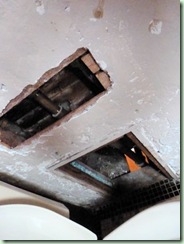
Well, RIGHT NOW has finally arrived! So far we’ve stripped everything out of there except the toilet paper. The walls and ceiling have been washed down with TSP and rinsed. There is a big hole in the wall between the toilet and the end of the bathtub exposing the seriously corroded 80-year-old pipes, the last ones in the house that haven’t already been replaced by T-Man. They’ve been dripping very slowly for years into a bucket underneath in the basement, located conveniently down there near my dye stove.

Yesterday we went hunting for a replacement sink. Again. We already replaced it once fairly soon after moving in. The reason we hesitated this time is because it’s hard to find the right colour. The style is easy: 19” circular drop-in, tap holes on 4” centres, 8” depth. The colour is a pale gold which of course is no longer available. White just doesn’t cut it. The tub and toilet are pale gold and the vintage glass floor tiles are dominated by the same colour. No, it is definitely not bone, almond or biscuit either but any of those would be better than white. We did find a lovely sink in the right size in a colour called “sunshine” which would be nearly perfect – except that it costs almost $200 and is a special-order. A little out of the price-range of old retired folks on a fixed income. Next we go look at a local contractor supplier which reportedly carries older sink styles and colours. Crossed fingers!

T-Man also picked up the plumbing supplies he needs to do the pipe replacement. And a honking big crescent wrench because the one he has isn’t quite big enough. Another set of crossed fingers since these jobs never seem to go without a hitch. He is currently sitting in bed, not dressed, reading a book and avoiding the issue.

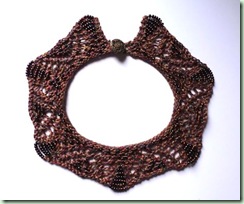
Meanwhile amongst the bathroom debris, I’ve made this:

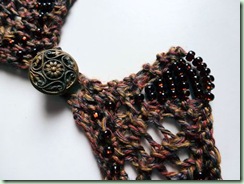
Endira Necklace

KnitNecklace

Begun:  May 26, 2012

Completed:  June 3, 2012

Pattern:  Endira Necklace by Cassie Castillo, from Interweave Knits, Summer 2012.

Yarn:  Louet Euroflax Sport Weight, colour Gypsy Bronze (one ply each gold/red/greenish-grey/purplish-grey), dyelot 18-2834-25/3. 100g = 270 yds. Used about 1/3 of a skein (81 yds).

Needles:  Addi Lace circular, 2.75mm.

KnitNecklace_detNotions:  Beads – Czech 6/0, silver-lined root beer. Button – vintage brass from stash.

Comments:  I probably should have used a slightly larger needle size since I didn’t get anywhere near gauge. The necklace came out several inches shorter than stated but it still fits my skinny neck quite nicely. The muted colour goes with a lot of garments in my closet but I’m sure it doesn’t appeal to many others! Don’t really know why I was inspired to make this because I really haven’t worn much jewelry lately. I like it anyway.

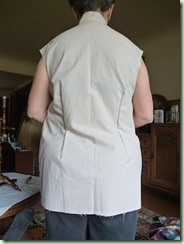
In other crafty news, I’m on the last round on my Ten-Stitch Blanket and I have about 1-1/2 rounds on T’s to go. It’s slow but I do a little every day so it will get done eventually. I’ve also been slowly working on my Pleat-Neck Blouse. The collar is nearly done. I just have to add the facing. Yesterday I tweaked the side seams and added fish-eye darts to the back to give it a little shape. First it looked like this:

BlouseFitting1

Such a great view of my amazing ski-slope shoulders! The darts and seams are unpressed here so look pretty awful! I took the darts a smidgen higher up my back. Just an inch and a good press made a difference:

BlouseFitting2

Better, huh? I also shaved a hair off the underarm area where I had added more than an inch to the original pattern. There’s still some major wrinkling at the shoulders and under the arms but some of that is because the armholes are yet unfinished. The rest is courtesy of my elderly shoulder shape and I just couldn’t figure out how to deal with it in this pattern with its forward seam/yoke. I’m ok with this much anyhow. The front is looking pretty good too so I should be finished quite soon. Then it’s into the dyepot with it!

Monday, June 04, 2012

Boy Scout vs. Cowboy

A relatively short and photo-free post today. Either that or no post at all since I don’t have any pics to share right now. I’ve been either out in the garden weeding or walking to the shops in those rare moments between the rain clouds. The weather has been very changeable and it’s rather dark and cold here on the Wet Coast today. My poor cucumbers and squashes need little umbrellas and woolly sweaters. They are shivering in their roots!

Today’s title refers to my Discharged Scarf. It refuses to stay put in my preferred “cowboy” style with the points in the front and wiggles around to the “boy scout” tails in front position any chance it can get. It also won’t stay tied unless I put a square knot in it. My thin cotton scarves and my knitted lace triangles only need a single half-knot to stay put nicely. This beast is a bit of a rebel! I’m learning to let it do its own thing rather than fight the inevitable. It’s a new look for me.

I do like this silk crepe enough to go back to the remaining piece to cut a long narrow scarf from it. I plan to bring it along to the Spectrum Study Group meeting on Thursday to work on the hemming. Hopefully I can do it without the magnifier light. At least I’ve had some recent stitching practise and know to bring along the leather thimble and the Thread Heaven. Along with a potluck dish, of course.

You might be happy to know that I’ve finally started sewing the “muslin” for the Pleat-Neck Blouse. Since I would prefer to make this a wearable (if possible) muslin and it needs to be nearly completed before it can be tried on, I’m doing a proper job of it including interfacing. I also decided to sew with cotton thread so that it will take the dye later. If it does turn out wearable, there is no way I’m leaving it that pale brownish mauve. Ick. I have dye and I know how to use it!

We were going to go out and garden some more this morning but it appears to be raining again. Oh well. Maybe we’ll start on the bathroom cleaning and painting job instead.

Friday, June 01, 2012

Discharged

Not quite a week between posts this time. I’m trying to improve! Of course it helps that it’s been raining on and off for days. What happened to that lovely late spring weather we were having? You know it’s bad when I’ve been reduced to wearing a sweater. Indoors.

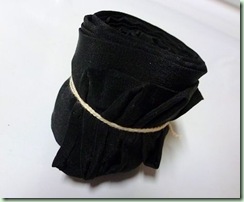
So what has that old damselfly been up to this time? Well, I finished hemming my black silk crepe scarf so then it was time to experiment with discharge on it. Just to give it some designs other than dead black and prevent me from looking like I’m going to a funeral or something. First I fan-folded and rolled it up like sushi maki and tied a string around it to hold it together:

BlackScarf rolled

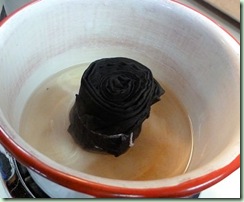
Then I tried to find out what the percentages were for the discharge chemicals. Silk is ruined by bleach (as am I!) so it had to be thiox (thiourea dioxide) and soda ash. But what proportions? Every authority that I consulted had different amounts and they were specified for vast amounts of discharge (2 gallons or more). I only needed a half a litre for my scarf. I settled on 1/4 tsp thiox and 1/2 tsp soda ash in 500 ml of nearly boiling water:

BlackScarf in pot

I ended up taking out half of the solution so the roll could sit immersed halfway up its sides. So fascinating to watch the colour leak out of the roll and disappear into the clear solution! It was really slow though and not nearly discharged enough so I swapped out the spent solution and added the other half to the pot. It’s only good for about 20 minutes before it loses its efficacy anyhow. It was kind of hard to tell what was going on in the roll and so I was disappointed with the results:

BlackScarf dry1

Just straight lines and a bit of interest at the edge that was on the outside of the roll. Next morning I tried again with a different fold:

BlackScarf clamped

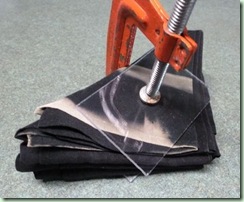
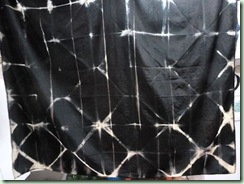
This time I did a wider flag-fold and clamped it between two pieces of Lexan (left over from our basement window safety protection). The Lexan was quite thin and ended up warping in the hot water but it did the trick. This time I used equal parts thiox and soda ash, 1/2 tsp each. This worked much better and quicker and although the results aren’t up to the gorgeous work I’ve seen from dyers who are experts in itajime (fold/clamp resist). But it’s much nicer than a plain black scarf:

BlackScarf dry2

The success of the design was kind of hindered by the first layer of discharge and I probably didn’t leave it in long enough to penetrate all the way through. I do like the rectangle formed by the Lexan on one corner and can wear it folded to show it off:

BlackScarf

Whaddya think? It obviously goes with a lot of my black and grey wardrobe. I might just see if I can get another pair of pettipants and a long scarf out of the rest of this silk crepe. Yum. Silk undies! Lurve. Not looking forward to hemming another scarf – though I am getting better at it. And it would be fun to try some more discharge.

What else have I been up to? Oh yeah. I cleaned half of my studio:

Studio1

I folded up poor Carolyn, my 12-shaft Woolhouse table loom and her stand and put them in the big closet in the other room. I wanted to add it to the attic space where I keep the guild’s rental spinning stuff and some of my spare equipment but it wouldn’t fit. No I’m not selling her, just giving her a little time-out. That gave me more floor space so I could turn the big cutting table around. Of course now that I could actually see my shelves of weaving yarns back there under the skylight, I had to go through them and dust. I was especially encouraged to be thorough after I saw a m*th! No damage – that I could find at least. Whew. I also cleared off the top of the yarn shelves so I could use its flat surface for my pattern blocks and current patterns-in-progress. Those slanted ceilings are a pain but it’s better than not having the space at all. I’ve learned how to duck. 

One thing about going through stash, I get ideas for ways to use it. Too bad everything takes so much time. If I could only whip things out as fast as my imagination! I did get inspired to start planning my bedroom curtain replacement and located the yarns for it, so watch for some actual weaving coming up. I haven’t done any weaving at all for 5 years! Yikes. Think I remember how?

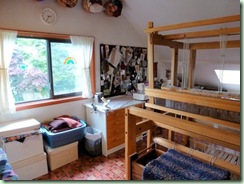
To prove I still have a big loom to weave on, here’s part of the other side of the studio:

Studio2

Notice the pieces for the pleat-collared blouse muslin are still sitting there on the sewing table behind the ball-winder untouched and unstitched. Soon. And there’s more fabric in those boxes lying in wait. So many projects! Too bad the days fly by so fast…