Thursday, February 27, 2014

On A Roll

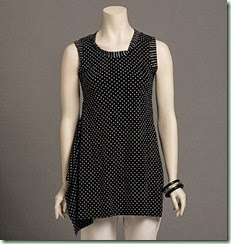
Yet another garment has rolled off the Damselfly Assembly Line. This time it’s my rip-off clone personal interpretation of Marcy Tilton’s Vogue 8582:

V8582 Marcy Tilton

This pattern is out of print and as such was prohibitively expensive from BMV. Until they recently when they had a sale on discontinued patterns but by then it was too late! I had already made my own using my TNTee as a basic block. I was going for View A, the sleeveless version:

V8582 ViewA

Not in polka dots though! They are definitely Not Me. The line drawing gave lots of clues as to the shape of the pattern pieces:

image

Easy-peasy. I needed to make full front and back pattern pieces which actually helped to get the most efficient placement on my fabric. This was the same charcoal cotton/lycra single jersey as the last 2 garments. And no, you haven’t seen the end of that particular 3-metre piece quite yet!

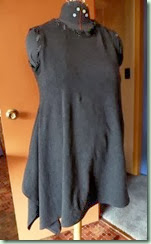
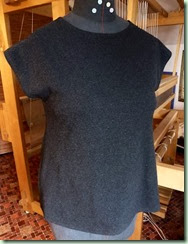
So please forgive the usual non-professional photography. I do the best with what I’ve got and can’t be arsed to try to set up the tripod etc. Anyhow Debbie is exactly my height and my shape and she stands very still for me! It might help if the light were better in my studio however…

Tiltonesqe

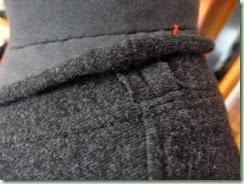
Don’t you love how the camera picks up all the wrinkles that you can’t see with your eyes in real life? Not. I didn’t use the Steam-A-Seam II in the hems on this top because I wanted a more drapey effect. It wasn’t too difficult to stitch them with the the twin needle after a really good pressing and pinning. And I think it did give me a more fluid hem without the fusible web inside.

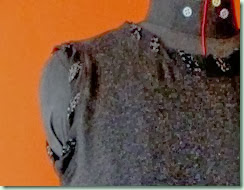
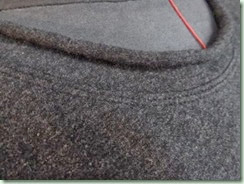
Anyway, I quite like this piece! (There may be more of them in future.) And a fuzzy detail shot of the neckline and armhole treatment:

Tiltonesqe_det

It was very fun playing with this detail! The armholes are snug enough so I can wear this either as a tunic on its own but still loose enough to fit over a t-shirt. It’s quite lightweight so will not be too hot to wear in warmer weather. My only concern, especially after I’ve made so many pieces from it, is that this fabric will eventually pill. Oh well. Time will tell.

I was asked by dear Pao in the comments how I learned to sew the knit seams. Actually it’s a combination of lots of experience, hints and tips from many sources, and The Ultimate T-Shirt class with Marcy and Katherine Tilton on Craftsy. (It’s currently on sale but I don’t know for how long.) The Tiltons have such great ideas for working with knits and make the kind of tops that I like to wear: a little artsy, a lot practical, and very wearable for women whose bodies are no longer sleek. Even if I don’t use their patterns exactly, the information is invaluable and I used quite a few of their techniques on these garments. There’s also quite a lot of inspiration and tutorials on Marcy’s website. Unfortunately it takes a lot of hunting to find things in her blog archives and in her tutorials, Marcy’s Closet and T-Shirt Gallery. I clip the good bits into Evernote so I can find them again.

In the end, you just get better by doing things over and over. Each knit is a little (or a lot!) different to work with. They’re pretty forgiving though so I really don’t know why so many people are afraid to sew with knits. You don’t have to worry quite so much about perfect fit. However I’ve definitely changed my preferences over the last couple of years for how a knit should feel. I’m avoiding the ones that just feel cheap, plasticy, sleazy, or likely to pill. (Note that you can’t always tell about the pilling thing until you’ve washed and worn the thing a few times.) I like knits with some body and definitely some lycra which gives good recovery so things don’t stretch out permanently. I’m quite fond of double knits which avoids the rolling edges problem because they lay flat. They are usually less stretchy, though really that’s not a big deal-breaker. I don’t make tight-fitting garments anyway!

All of the above are my favourite reasons why I don’t order fabrics online. I need to touch before I commit. Even if there is a good return policy (which doesn’t usually happen for us Canadians) I’m not going to risk it. Sadly I have less options available locally. Hence why I go a leetle beet crazed when I’m in Portland which has fabulous fabric stores! Hmmm…I honestly can’t remember when or where I bought the charcoal jersey because I’ve been hanging on to it for a number of years. I guess I just had to get better at sewing before I tackled it. And it had to figure out what it wanted to become. It changed its mind at least 3 times! Now it’s going to be 4 garments in total. Worth the wait, I’d say.

Yes, Top The Fourth. The last bits of this jersey (a pair of long sleeves and some edge binding strips) are going into yet another top. One that isn’t finished being cut out yet. And there’s lots more garments in the pipeline. I’m on a roll! So…

More anon!

Wednesday, February 26, 2014

It Comes; It Goes

Well we didn’t exactly endure Snowmageddon but 3 days straight of nothing but snow-snow-snow is pretty unusual for our mild maritime climate. The weird thing was the temperature continued to hover around 3C the whole time so accumulations didn’t mount up the way they would have if it had been below freezing. It kept melting out underneath. When it stopped snowing and warmed up even more yesterday it began to melt in earnest and today, now that the overnight fog is burned off, we are seeing large patches of green grass again. Guess that was Winter, huh? Hopefully! I’m planning to start my seedlings in my “grow-op” very soon and they’ll be needing a garden to put them in when they’re ready.

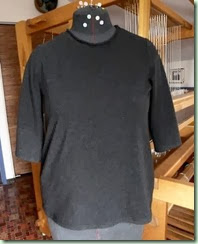
Meanwhile, I’ve been quite productive in the studio. I have 2 finished tops and one more well in progress. Please forgive the photo quality. In my defence it was snowing at the time and rather dingy in my studio! The colour of the single-knit cotton/lycra jersey fabric is much darker than the photos show – more nearly black. Here’s Charcoal Top The First:

TNTshirt

This is my latest self-drafted TNT-Shirt Pattern with 3/4 length sleeves. I think it looks somewhat better on me than on Debbie since I actually have arms! Though it does fit her quite well otherwise. I had fun with the neckline binding and used the extremely tightly rolling selvedge:

RollingSelvedgeNeckline

It was a bit tricksy to apply in order to keep the roll happening at the seam. I had to stitch it on the outside:

NecklineSideseam

I lined up the seam at the left shoulder for a slightly jaunty asymmetry. Or not. It doesn’t really show all that much. Anyway that’s it for this first quite basic layering piece.

Next for Charcoal Top The Second, I sewed my fit-adjusted version of MariaDenmark’s free Kirsten Kimono Tee pattern:

KirstenT

This one is super-simple, only 2 pattern pieces. Using a hint from Sandra Betzina, I made good use of my stash of 1/4” Steam-A-Seam II on the ever-rolling hems:

SteamASeam

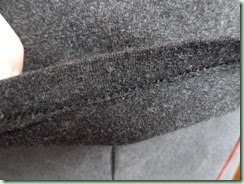
BTW this photo is the closest to the real colour of the fabric. The clips were necessary on the front neck curve to get the hem to lie flat. Those bits were mostly trimmed off after stitching. Steam-A-Seam II is tacky on both sides and sticks the hems down fairly well. After you get it in place you iron it for 10 seconds and it becomes permanently stuck. For extra security I also twin-needle stitched over the hems using woolly nylon thread in the bobbin for extra stretch:

TwinNeedleHemTwinNeedleHem_under

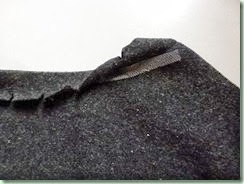
They came out very nice indeed! Flush with two successes I started in on Charcoal Top The Third. This one isn’t finished yet so you’ll just get a teaser this time! Obviously I’ve been absorbing some online lessons and inspirations because I went all artsy and Tilton-esque on the neck and armhole binding:

BindingEmbellishments

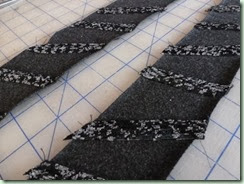
Those are narrow strips of slinky knit in a fascinating black and gray design that were left over from sewing my well-loved pop-over tunic and dress that I made awhile back. The fabric came from one of my shopping forays in Portland, OR. I stitched them on with the twin-needle and woolly nylon combo in random tilted stripes. Then I offset the two long edges by about 1/2” to make it really wonky and twisty:

BindingShifted

It’s hard to get stitched in place evenly but that just adds to its charm, no? I think it’s really cool but you’ll have to wait for the big reveal. The neckline and seams are done but I have the armhole bindings (those same twisties there!) and hems to finish still.

So what else? Oh yeah. I can hardly bear to show you my Epic Fail:

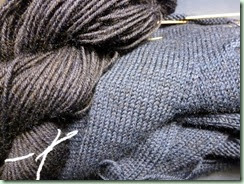
No Match

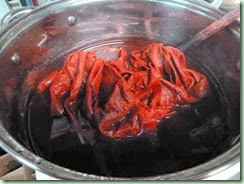
See how that skein on the left doesn’t remotely match those socks on the right? Ummm…I made a mistake in a decimal point when I measured out the acid dye. Can you say “Bad Dyer Damselfly” three times fast? Nevermind. He gets dark toes on his socks. ‘Nuff said.

And there ya go! The sun is out and my studio is actually light enough to see stuff in without artificial help. I should get up there while the getting is good.

More anon!

Sunday, February 23, 2014

Snow Day

Well, so as not to be outdone by the rest of Canada (and most of North America) we are having a lovely snowy Sunday today!

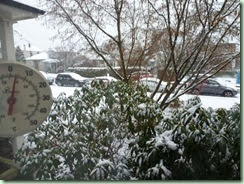
Snow Day

A perfect day to stay inside and sew. What? You can see that thermometer and it’s not even very cold out there? Only down to 3C. Not even freezing! So tell me, why has it been snowing for 2 whole days? Admittedly it took most of yesterday to even start building up because it was melting almost as fast as it fell! It’s totally yukky and slushy and I don’t have to be anywhere so I’m not going out to slog in it. I hate wet feet. Looks kind of pretty though. From in here.

Moving right along. You will be pleased that I’m finally going to publish the proper FO report for my last 2 makes:

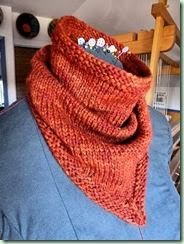
Burning Embers Bandana Cowl

clip_image002

Begun: January 31, 2014

Completed: February 3, 2014

Yarn: handspun chain-plied worsted weight wool/silk/Angelina (Silky Pearl Glitter from Aurelia Wools, results of several guild spinning demos). Dyed semi-solid orange-red with acid dyes in microwave. 60g, about 120 yards.

Needles: Addi Lace Clicks, 6mm. A couple of stitch markers are also needed.

Pattern: Bandana Cowl by Pearl Soho. Free pattern available on Ravelry.

Comments: I know, it looks kind of silly modelled by Debbie Double! (She brings new meaning to “pinhead” doesn’t she?) Love this pattern and the results. I’ve already worn it several times and it kept me very warm and stayed in place very well. The colour is certainly warm enough!

My handspun yarn was more like worsted weight than bulky but it worked ok - a bit loose but not too bad and it won’t matter in a cowl. I learned Ysolda’s wrapless short-rows for this project. Love this technique and it will be the go-to one from now on. It’s just like the Japanese short-rows but uses a piece of yarn instead of a safety pin. Less fiddly.

I might just be making more of these cowls in future. There were envious looks from certain family members.

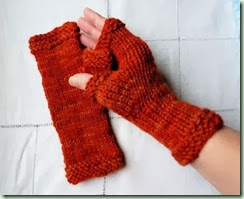
Burning Embers Mitts

Burning Embers Mitts

Begun: February 3, 2014

Completed: February 13, 2014

Yarn: handspun chain-plied worsted weight wool/Angelina (Silky Pearl Glitter from Aurelia Wools). Left-overs from cowl. 40 g.

Needles: Clover Takumi bamboo dpns, 5mm

Gauge: 17 sts = 4”, 28 rows = 4”

Pattern: (Mine!)

Fits one size: pretty small!

  • CO 28 sts. Join in round.
  • [P 1 rnd, K 1 rnd] x 3. K 14 more rnds (or desired length to thumb gusset).
  • Inc rnd: kfb in next 2 sts. K to end.
  • Next rnd: k.
  • Rep last 2 rnds until 14 sts between inc.
  • Next rnd: k first st and place next 13 sts on waste yarn. E-wrap 1 st and cont knitting to end of rnd. 28 sts.
  • K 12 more rnds.
  • [P 1 rnd, K 1 rnd] x 2. BO in purl.
  • Pick up sts from waste yarn. Join yarn and PU 2 sts in gap. K rnd.
  • Next rnd: k2tog (picked-up sts), cont knitting rnd. 14 sts.
  • [P 1 rnd, K 1 rnd] x 2. BO in purl.

Comments: In an attempt to use up the last of the handspun yarn, I decided to make fingerless mitts on the fly. It took 2 attempts to get the numbers right but I think they worked out very well! There were only a couple of metres of yarn left at the end.

In other knitting news, I still haven’t finished the Blue January Socks. I’m planning to try dyeing some matching yarn today to complete them with. However close it turns out I’m going to use it anyhow. These need to be done. Particularly because I already started another pair of socks. I needed a portable project to be able to sit through Thursday’s guild meeting so I decided to try my Sweet Georgia Tough Love Sock yarn in the colourway “Phoenix Rising”. In a fit of madness I also used the Retro Rib sock pattern by Evelyn Clark that had taken me so long to knit last time I used it. I do like those socks though and they seem to work ok with a variegated yarn. I’ve finally got the pattern stitch in my hands now anyway so it’s good that I’m using it again before I lose it. This is my first experience with the Tough Love though. I want to see how well it wears over time. Feels nice so far. Since I only live a couple of kilometres from where dear Felicia and her elves dye this stuff, it’s an easy yarn for me to obtain. (Hey, I wonder if I could get her to sell me some of her base yarn? Must ask.)

On my Simple Tweedy Pullover I’m currently up to where I divided front and back and added on stitches for the sleeves. This is fine yarn 2/8 Shetland wool and knitted on 2.75mm needles so it’s quite a long slog in stockinette. Great movie and Olympic skating watching stuff actually. I do enjoy just knitting around and around though. No-brainer.

In sewing news, I’ve started actually sewing some of the garments I recently cut out. I found a flaw in the fabric near the shoulder on one sleeve! Whaaa! There are only the tiniest scraps left so no chance of cutting out another sleeve piece. On closer inspection It was a lump where the knit got caught up. It didn’t show much on the right side but had a tiny hole right through. I clipped off some of the lump on the back which of course made the hole bigger. Argh. So in desperation I unravelled a little strand out of a scrap and used that as thread to stitch up the hole. Well, it matched better than thread would have! And then I gently used Fray-Chek on the back side to make sure it held together in the wash. Hopefully that will do it and you can’t readily see the repair unless you’re looking for it. I’d photograph it for you but it’s dark charcoal gray and doesn’t show up at all well.

I’m taking my time with the sewing because, hey, there’s no real hurry here! It has to be fun and not a chore. Or a marathon. Although I’m looking forward to having a few new tops to add to the old wardrobe. This is more like “bread” sewing – not even “cake” and far less exciting than “icing”! But that’s the kind of thing I wear most so that’s what I’m making. Besides, I can’t buy even basic plain t-shirts that fit these days. They’re all either too big or too small in all the wrong places. Interestingly, it’s not my body’s current shape that’s the problem either. I have older purchased t-shirts that still fit fine. (Though they could be longer so I usually wear them under another layer.) It’s obviously the current fashion that’s the true problem. Oh well. It’s much more satisfying to make my own anyhow because then I get exactly what I want, right?

More anon! Yes, it’s still snowing…

Friday, February 21, 2014

Whirlwind

Whew! It’s been a very busy week here in Damselfly’s Pond. Well, what passes as plenty busy for my retired lifestyle anyhow. Last Sunday my son and his family came over for a visit and Princess Silver Fang and I finally managed to get her t-shirt finished. We started it way back in October by scrunch-dyeing some white cotton jersey and tracing her favourite purchased t-shirt for a pattern. We haven’t had much time to complete the project in the meantime. She got the pieces cut out and drew a skull on the undyed white fabric to embellish the front of the shirt. I glued it on with temporary spray so she could stitch it on but that’s as far as we got. I offered to finish it for her for Christmas but she was determined to do more of it herself.

So in a flurry of mad sewing, we finally got the thing put together. It was a combined effort: I did the neck band and the serging but she did all the rest. She really cemented some useful skills like sewing backward and forward, lifting the presser foot and turning the piece to sew the skull. The teeth were especially hard work and turned out very cool. And I forgot to take a photo before she left! Bad, bad damselfly. It fits her but not for long I think. This 9-and-a-half-year-old grandbeastie is getting taller by the day! Funny how that happens.

On Monday and Tuesday I spent a happy time cutting out some of my newly adjusted and/or created patterns. I managed to get 3 tops and the sleeves and bands for a fourth out of 3 metres of charcoal cotton/lycra jersey. This is the kind that rolls up madly in all directions but I love the slightly marled dark gray colour so much. Nearly black but not quite. It has good stretch in both directions but recovers well. I’m hoping to get a lot of wear out of these. The body of the fourth top is going to be in a really textured fabric, kind of crinkly and elasticized. I can’t really describe it well and because it’s black it doesn’t photograph well either. I haven’t cut that part out yet because I want to sew another one of the tops first to see how it fits before committing the scrunchy stuff to the rotary cutter.

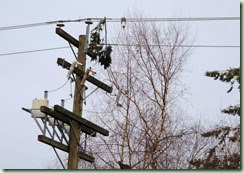
Tuesday afternoon ended up kind of crazy. It was quite windy and a branch blew off from one of our neighbour’s huge fir trees. This is directly across the side street from us and I could see it from my studio window. It landed on the high-tension power lines right near the transformers.

ShortBranch

The wind blew some more and the branch contacted and caused an electrical explosion of huge sparks! I heard this otherworldly noise and our power went off for a moment. I nearly jumped out of my skin! Some poor woman was walking her dog underneath at the time and she dashed across the street to our side after nearly getting hit by falling sparks. Yikes!

Thom called BC Hydro to let them know and finally after half an hour a truck showed up. He sat there for awhile making calls and then left. What? Just after he left it did it again! Sparks and power off/on and the horrendous racket. Somebody called the fire department then who showed up, looked and left too. Double-what? After 2 more shorts in quick succession another fire truck (the next shift) showed up and finally blocked off the street. Meanwhile Thom was back on the phone with Hydro who finally showed up with the right gear to fix the problem. The firemen left and we didn’t see what happened next.

Because we had to go out. I was to give my talk about growing and using dye plants to the Richmond Weavers and Spinners Guild and Thom was delivering me. It was a small group but they were very welcoming and I enjoyed yapping about my favourite subjects of gardening and plant dyeing. Luckily I had my trusty Powerpoint slides from last year when I did this talk for my guild. I always forget to say something or other but the gist was there, prompted by my slides. A guild member was kind enough to get me home again.

When I got back, Thom filled me in on the Electrical Nightmare story. The sparks had apparently happed one more time with the Hydro guys watching and They Finally Got The Point! I don’t think they had realised how dangerous it was before. They had to turn off the power and splice in a new piece of high-tension wire before it was fixed. Hah! Maybe if they had done something right away 3 or 4 hours before, it wouldn’t have been such a chore. Meanwhile the entire neighbourhood was completely frazzled!

I was pretty wired that night so it was hard to sleep. But bright and early Wednesday morning we were reminded that we had promised to babysit the littlest grandbeastie, Rosebud (aka the Snot Fairy), for the Whole Entire Day! Oy. Luckily she is the easiest 3-year-old on the planet and we had a lovely day together. She even helped me with my cutting out another garment (a Tilton skirt this time) by placing my rock weights on the pattern, accidentally shifting it after I spent 10 minutes trying to line up the plaid. So helpful! The rocks did keep her busy for quite awhile as she rearranged and counted and filled a basket with them. Then we wound a skein into a ball with the ball winder. Gotta get ‘em started young I say! When I got tired she headed off to play with her grampa. She adores him and it’s really nice to be able to spell each other off. Naptime was conducted easily by taking her for a walk in the stroller. Out like a light. I have to say we were quite happy to see her dad that evening though. Even happy and very fun 3-year-olds are exhausting. We aren’t as young as we were when our two were little.

So yesterday (Thursday) was my weavers’ guild meeting. The talk this time was really interesting: Ann Hamer on dyeing with mushrooms. I had contemplated trying this in the past but never knew whether the right type of mushrooms grew in my area. Ann is from the Sunshine Coast (just north and slightly west of Vancouver) and has access to a huge area of Crown Land forest so she definitely has the advantage of me here in the city. It was particularly helpful though to see the photos of the 3 or 4 most useful types to look for. She showed lovely examples of not only wool yarns but silk camisoles and scarves dyed with her mushroom collections as well as a mushroom paper bowl and pigment crayons. The colours are surprisingly intense and beautiful including reds and oranges worthy of madder and a blue nearly as nice as a light woad. Very exciting.

Ann also answered my biggest question about harvesting. I was concerned about the environmental impact of picking mushrooms and was assured that it wasn’t like harvesting lichens. The main body of the mushroom is below the soil and as long as you don’t disturb the ground they will grow again. Gee. Now I want to try this but I have to wait for next autumn! Darn. As always I want more information so I have ordered the new updated and reprinted book by the late Miriam C. Rice from a company in WA state called Fungi Perfecti. They seem to be the only place this important work is available. In my defence, I’ve been very good about buying books lately and this is the first one in ages. Besides, I got a nice little honorarium for doing the dye talk so it all works out.

Now I’m off to actually start sewing up some of the garments I’ve cut out. More anon!

Thursday, February 13, 2014

Checking In

I don’t know why but I haven’t really been inspired to blog lately. It might help the non-blogging issue if I actually took some photos but I haven’t been in the mood for that either. Definitely a case of “camnesia”. It just seems like too much work. Bad damselfly.

Instead I’ve been reading, knitting, walking (when it isn’t raining), and madly adjusting sewing patterns. I haven’t even been cutting out the fabric yet though so no actual sewing has happened. I swear it takes as long to get the pattern prepped as it does to sew the darn thing. Anyway I figured that while I’m in the mood for playing with patterns then I should surf on that wave as far as it will take me. It will run out eventually. Probably when I hit a really complex fitting issue that I can’t immediately solve.

I also haven’t finished knitting anything since the Burning Embers Bandana Cowl. Yes, I know I haven’t really done a final FO post on it yet. It sure came in handy at yet another family birthday celebration last weekend out at Reifel Bird Sanctuary where it was really cold. It keeps my neck and chin really toasty. Such an excellent pattern! I’m using the last of the Burning Embers handspun for a pair of fingerless mitts to match. They’re nearly done. Unfortunately I got stalled on the Blue Socks for my niece’s boyfriend because I made the legs longer than I should have so that I’m running out of yarn before the toes. Grrr… Nothing else really works with the dark denim blue either so I’m not sure how to finish them. No, I’m not going to frog back.

Things have thawed out and warmed up around here after a rather chilly last week or so. The snowdrops and witch hazels are blooming and the early crocuses are coming out. I know – those still experiencing extreme winter don’t really want to hear about that!

So now you know I’m still here! More anon.

Wednesday, February 05, 2014

Happy Imbolc! (A couple of days late…)

How did it get to be February already? I’m feeling somewhat better now and most of my energy is returned. The sun is out but it’s really cold – at least in local terms. I had to put a blanket on my rosemary in the greenhouse at night and my poor primulas in the front door basket got a little frozen. You can always tell when the temp drops down past a certain level because all the rhododendron leaves curl and droop down. They seem to recuperate ok when it warms up again. However despite the current chill it’s actually been a pretty mild winter. It’s odd to look up at our North Shore mountains which hardly have any snow at all on them.

So what have I been up to? (Besides blowing my nose?) I completed another test knit for Sanjo. I don’t think they’d mind me showing you this time:

SilkMohairCowl

It’s a silk and kid mohair cowl or infinity scarf exactly like the collar I made for my last test knit except that it’s 3 times the number of stitches. I like this one much better. You can wear it in a number of different ways and my favourite is to wrap it around the neck twice. Deliciously slinky and lightly fuzzy and very warm.

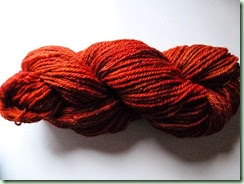
Next up I dyed the demo skein of NZ crossbred wool and angelina fibre:

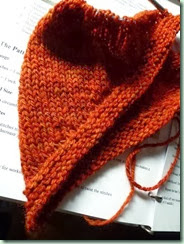
Burning Embers handspun

I used some of my aging acid dyes and made a semi-solid that I call Burning Embers. The angelina looks like tiny sparks! Very pretty. Then I knit it into the Bandana Cowl pattern. I used this knit to learn how to do Ysolda’s Wrapless Short-Rows from her new video. I love this technique and will adopt it as my go-to method from now on!

Burning Embers Bandana Cowl_prog

I’ve actually completed the cowl but haven’t blocked it yet. After a quick steam under the iron, I wore it out in the cold yesterday! Yummm…. Proper photo to come. I’m also currently knitting fingerless mitts from the remaining 40g of this yarn.

In keeping with my deep orange-red colour theme I also dyed some unbleached cotton canvas for a Spectrum project. After scouring and mordanting first in 8% tannin and then 15% alum, I used some very old Red Sandalwood dyestuff that had been soaking for…ummm….a couple of years! It never went mouldy or anything and this time worked really well:

RedSandalwood on canvas

I also added a little calcium carbonate and soda ash to the bath to offset our soft acidic water. Of course the dried fabric is quite a few shades lighter and came out kind of marbled. I like it though and now it will be printed with natural dye paints. Eventually I’m planning to sew a tote bag for my larger knitting projects. I seem to be working with large coned yarns and dragging the projects around the house. It would be nice to have a very specific bag to keep everything together. More on this later.

Now it took me about 5 sessions but I finally hemmed the Japanese damselfly fabric strip that Heather gifted me with:

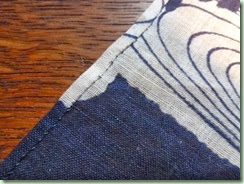
DamselflyScarf_hem

It’s a lovely sheer crisp cloth and I think it’s what the Japanese call asa (hemp) though that could also mean any bast fibre including ramie,  linen, banana or wisteria. The printing in indigo is exquisite and I almost can’t tell which is the right or wrong side. The finished piece is just long enough to wear as a scarf. Thanks again, Heather!

So now I must go and sort out my seeds for this year’s plantings. We will be going to the garden shop today so I want to make a list of anything that I need to look for. I know it’s still early to plant even for our West Coast weather but seeds sell out quickly and I don’t want to miss my chance. It’ll only be a few more weeks before my basement “grow-op” gets started! Time flies when you’re having fun, doesn’t it?